Overview
Listed here are the detailed steps used in troubleshooting image quality with Carestream RVG 6100 and 6200 sensors in Version 12 of TDO. If you are using Version 11 of TDO, please see Troubleshooting Carestream SDK X-Ray Image Quality Version 11.
Requirements
What integration is currently being used?
The first thing that must be done is to determine what integration is being used to acquire x-rays. To do so, first check:
[Setup > Site Configuration > Edit Control Table > Workstation Settings]
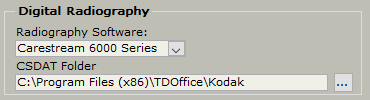
Under the Digital Radiography heading, check to see what is listed as the radiography software
If you are not currently using the SDK and your main concern is quality, one of the first things to do will be to update to the Carestream SDK integration. If the issue is related to a potential hardware issue (for example, the sensor does not show as connected) first troubleshoot the hardware issue, and then, after resolving the issue, update to the SDK.
After updating to the SDK integration, you can then start adjusting for quality. And to do so, the next spot to check is the X-ray Generator.
To update your workstations to use the most recent SDK integration, download and install SetupCarestreamSDK.exe from the Download TDO page of tdo4endo.com, and ensure that your Control Table’s Digital Radiography Settings look like the screenshot above.
X-ray Generator Settings
Prior to adjusting software settings, it is absolutely necessary to first verify that the correct x-ray generator settings are being used. If not, x-rays may appear grainy. There is very little that can be done with filters to adjust quality issues that stem from improper generator settings. The analogy that I frequently use is that you can have all the filters available in the world and it wont fix an x-ray that was taken with the wrong settings.
Carestream has specific x-ray generator settings:
Wall Mounted Unit: 70 KV, 7 MA unit with an exposure time somewhere between .10 - .16 seconds (6 to 10 pulses)
Wall Mounted Unit: 60 KV, 7 MA unit with an exposure time somewhere between .14 - .20 seconds (8 to 12 pulses)
**If the x-ray generator does not allow for the recommended KV or MA, the exposure time must be adjusted to get the proper dosage**
Nomad: With the Nomad generator, it has a fixed 60kv, and a 2.5ma so the exposure time should be .24 -.36 and it must be fully charged.
Commonly held view - We adjust the x-ray generator settings depending on the tooth
While I can see this makes sense, adjusting the x-ray generator settings for each tooth will also require you to adjust the x-ray filters each time. It is better to have the generator set to an exposure that will work for all teeth, and only adjust the filters as necessary. This cuts the amount of work required to take good quality x-rays in half. And it is very likely that filter settings can be found so almost all x-rays can be taken without adjusting the quality at all.
If your concern is grainy x-rays it is most typically that the x-ray generator settings are incorrect. Adjust to the settings Carestream recommends and if you are unable, adjust the exposure time accordingly.
At this point, a test x-ray must be taken to train the proper usage of the integration.
Adjusting Filters in SDK
After the sensor has been plugged in, take an x-ray that as closely matches how x-rays are normally taken on a patient.
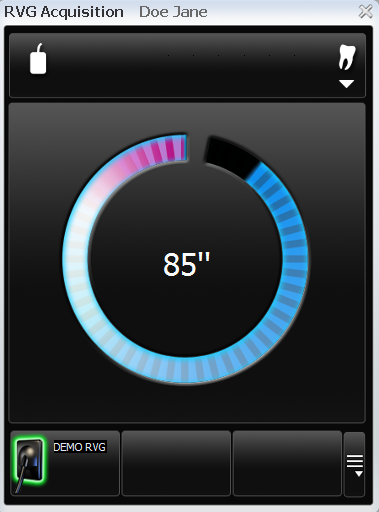
A timer will appear if using a 6100 and begin a countdown; if using a 6200, no timer appears but a green halo will appear on the lower left of the window. Expose the sensor when ready to acquire.
User Interface
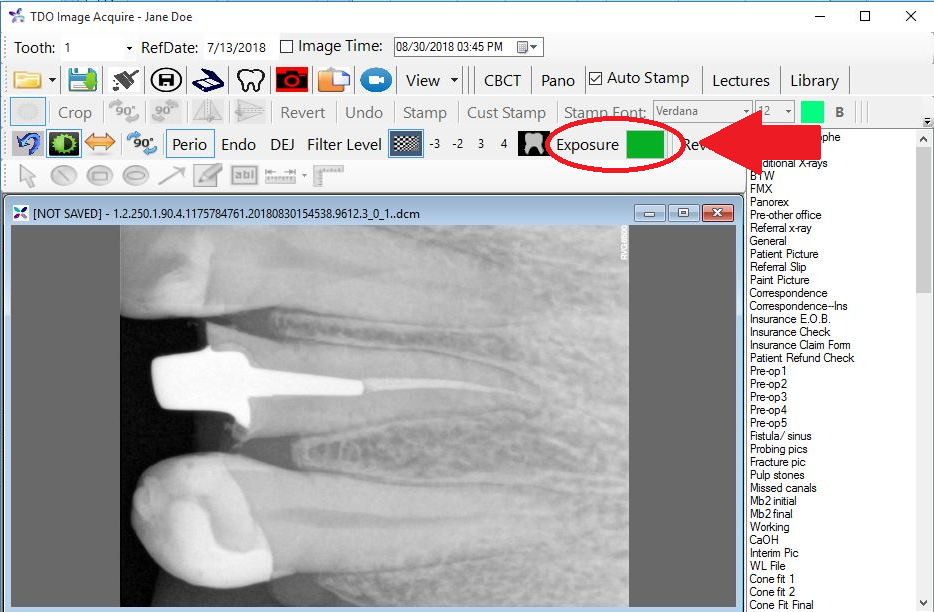
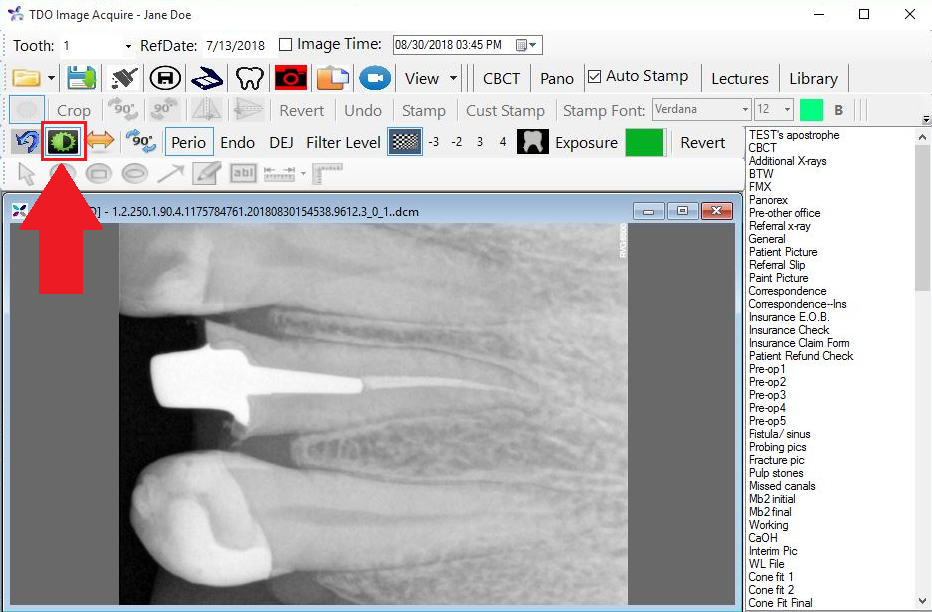
After taking an x-ray, the first thing to notice is the exposure bar circled below. Green would mean enough exposure time was used. Red would mean not enough exposure time was used. It is helpful in determining whether exposure settings need to be adjusted.
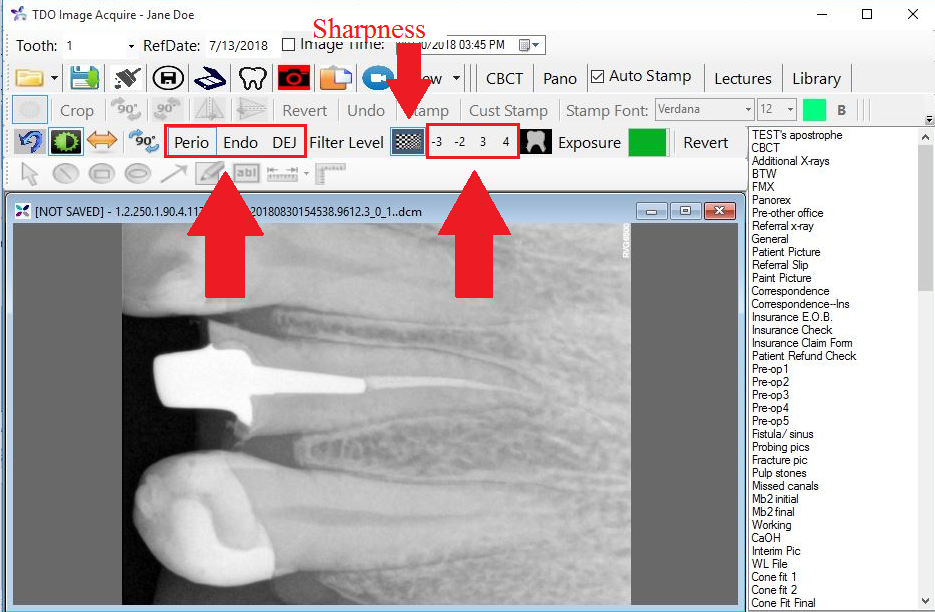
Next, there are the Perio/Endo/DEJ filters. Find the appropriate filter that provides the best starting point for adjusting quality. Try each of the Filter Levels and the Sharpness filter as well.
Colors Filter: Once the proper PERIO/ENDO/DEJ setting has been found, the colors filter helps final corrections. Ask the Doctor what would improve the exposure: more contrast, darker or brighter, and then open the colors filter. To open the colors filter, click the green half-moon icon.
There are three sliding options which we will concern ourselves with: Brightness, Contrast, and Gamma. To begin, ensure that all value are set at zero as shown below.
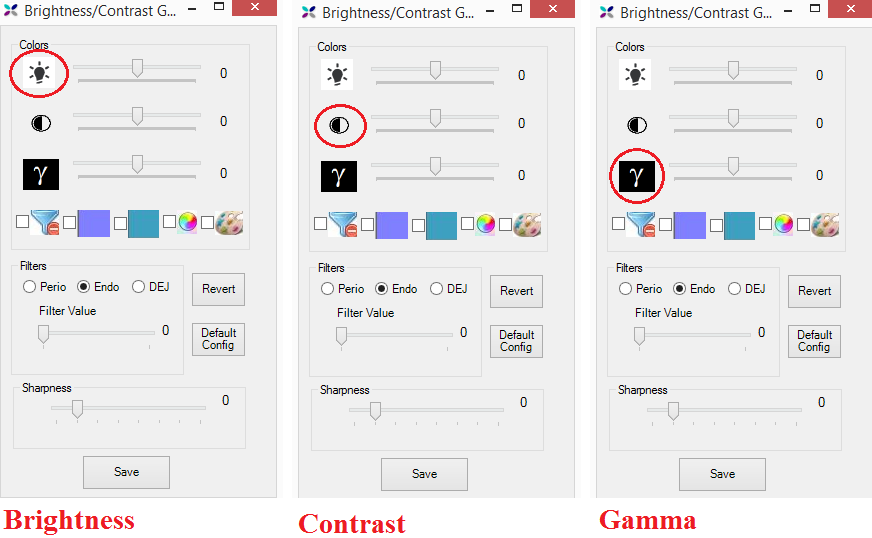
Typically, the best filter to start with is the Gamma filter. If the office wants a darker image, click on the slider and move to the right asking the office to tell you when to stop. If the image should be lighter, slide to the left. When a suitable level has been found. Ask if the image needs more or less contrast, and then follow the same steps for the contrast slider. And then the brightness filter if necessary. Once you are happy with the image, click the Save button to save your own custom filters. Have a staff member write down the values listed just in case someone accidentally changes it. The next time an x-ray is taken, it will use the settings you have chosen.
If a specific x-ray needs to be adjusted, open the color filter box and make whatever adjustments necessary. But do not click the SAVE button unless you want those to become the new default values.
Applying Settings to Other Operatory Computers
If there are any other operatory computers where quality needs to be adjusted, these settings can be reproduced by having a staff member take an x-ray of anything (a file or instrumentation) and then applying the PERIO/ENDO/DEJ settings as well as Color Filter settings that you have found for the first machine and then clicking Save. The only time where you would need to go through this same process of adjusting everything would be if a different x-ray generator is used and the exposure time is different.
At this point, the staff and doctor should be aware how to properly adjust the settings for the SDK interface.
Article ID: 717
Created: August 30, 2018
Last Updated: November 20, 2025
Author: TDO KB [web_admin@tdo4endo.com]
Online URL: https://kb.tdo4endo.com/article.php?id=717