Breeze Booth / DSLR Remote Pro Setup
Estimated Reading Time: 3 MinutesOverview
This article will cover the steps necessary to integrate Breeze Booth (DSLR Remote Pro) software with TDO. DSLR Remote Pro allows you to remotely trigger your Canon EOS digital SLR from a Windows PC via USB. By integrating this software into TDO, you can trigger your camera from the Acquire window in TDO. The picture will be sent directly to the Acquire window.
Note: The dll swap found in the instructions below is no longer required in TDO, starting on version 12.405. Please continue to follow the remaining instructions.
Note: TDO simply calls the DSLR Remote Pro software. As such, we cannot troubleshoot problems that arise with DSLR Remote Pro itself, though we can troubleshoot the link between TDO & DSLR Remote Pro.
Note: Breeze’s DSLR Remote Pro software only supports Canon cameras (not Sony or any other manufacturer). See a list of supported models here.
DSLR Camera is generally recommended; however, Canon's mirrorless M6 Mark II, M50 Mk II, M50, M200 cameras are all supported
Note: If the camera cord is longer than 15 feet, a booster cable is required.
Detailed Instructions
Installing Breeze Booth (DSLR Remote Pro)
Note: A single-camera license for Breeze Booth (DSLR Remote Pro) is $275 USD (per computer) as of January 2020.
- Install DSLR Remote Pro to the default location (x64 systems: C:\Program Files (x86)\BreezeSys\DSLR Remote Pro, x86 systems: C:\Program Files\BreezeSys\DSLR Remote Pro).
- Open DSLR Remote Pro. Make sure that you can connect your camera and that you can capture an image.
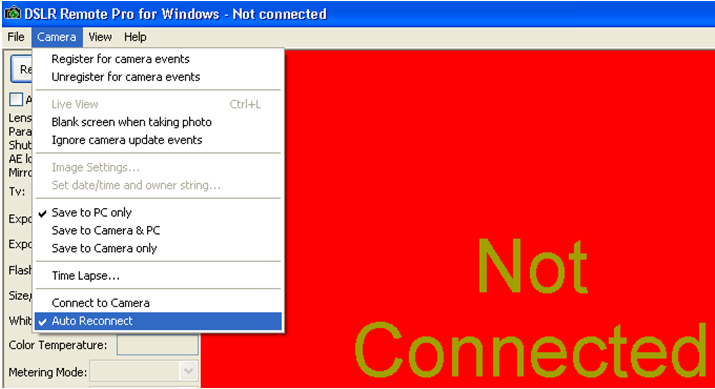
Note: It is recommended that you enable the Auto Reconnect option in DSLR Remote Pro for your convenience. You can find this setting in the Camera menu. See the screenshot below.
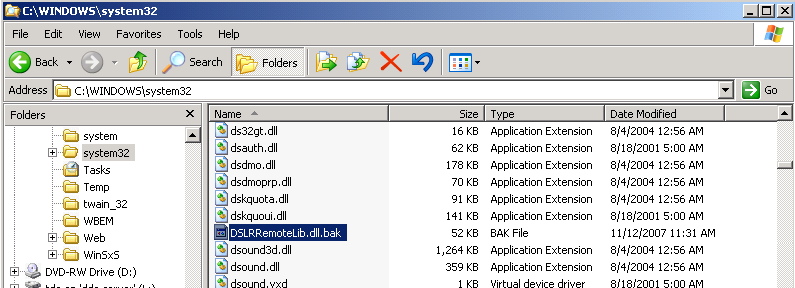
- Rename the dslrRemoteLib.dll located in C:\Windows\System32\ [x86 systems] or C:\Windows\SysWOW64\ [x64 systems] to dslrRemoteLib.bak.
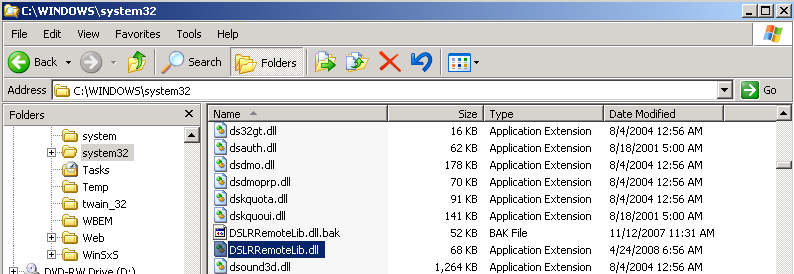
- Copy DSLRRemoteLib.dll from either C:\Program Files\BreezeSys\DSLR Remote Pro\DSLRRemoteTest\ [x86 systems] or C:\Program Files (x86)\BreezeSys\DSLR Remote Pro\DSLRRemoteTest\ [x64 systems] to C:\Windows\System32\ or C:\Windows\SysWOW64\.
Configuring TDO
- Open the Control Table (v11: [Administrative > Edit Control Table], v12: [Setup > Site Configuration > Edit Control Table]). In the Remote Camera section of the Workstation Settings tab, set the Software option to Breeze Systems. On an x64 system, set the Remote Camera Software Path to C:\Program Files (x86)\BreezeSys\DSLR Remote Pro. On an x86 system, set the Remote Camera Software Path to C:\Program Files\BreezeSys\DSLR Remote Pro.
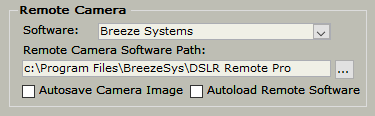
Note: You can check the Autoload Remote Software option to automatically launch DSLR Remote Pro when the Acquire Window is opened. Checking the Autosave Camera Image option will automatically save the captured image.
- Reboot the computer.
Using DSLR Remote Pro with TDO
- Open TDO.
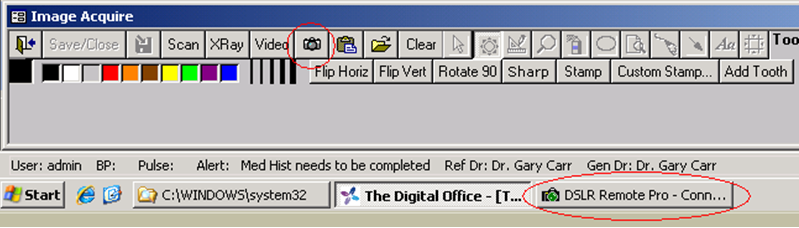
- Click on the Acquire button.
- If you have checked the Autoload Remote Software option, DSLR Remote Pro will automatically open in the background, and a picture will be taken as soon as you click the camera button. Otherwise, DSLR Remote Pro will launch when you click the camera button, and take a picture immediately thereafter.
- As soon as the image is taken in DSLR Remote Pro, it will be sent to the Acquire Window (and automatically saved if you have selected the Autosave Camera Image option).
Troubleshooting
- Ensure that you can launch DSLR Remote Pro outside of TDO.
- Ensure that you can connect your camera to DSLR Remote Pro.
- Ensure that you can remotely capture an image with DSLR Remote Pro.
- Make sure you have copied DSLRRemoteLib.dll to either C:\Windows\System32 [x86 systems] or C:\Windows\SysWOW64 [x64 systems]