[v12] Patients page
Estimated Reading Time: 29 MinutesOverview
When logging into TDO the Patient page will always be the opening screen. Unless TDO has been newly installed on the computer, the Patient page will show the last patient that was viewed on the workstation. From here you can view all of your patient's general information including contact details, personal information, referral details, general dentist, employer, emergency contact, spouse, guarantor, legal guardian, email, and web credentials. As well as, mark a patient as do not schedule.
There are several ways information can be added to this page. The information can be filled out by the patient on a paper form and the office staff can manually enter the values into TDO. The patient can complete the information in office through the Infograbber application on a tablet pc. Or, if your office has Cloud services, the patient can fill out the information on your website.
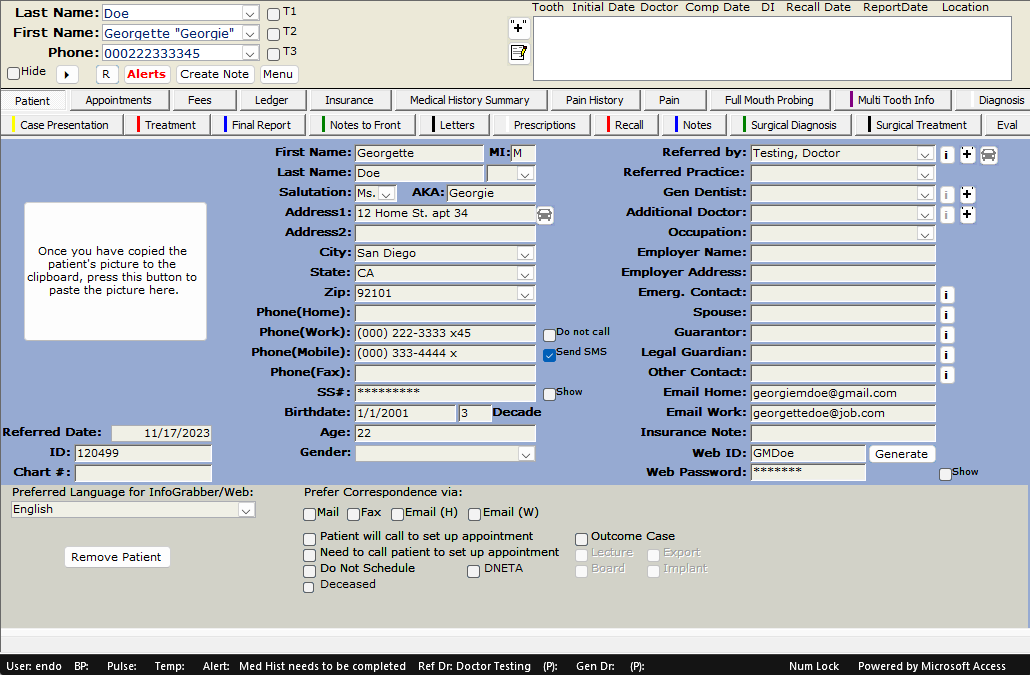
Table of Contents
- Patient Picture
- Referred Date
- Patient ID
- Chart Number (#)
- First, Middle, & Last Name
- Suffix & Salutation
- Alternative Name (AKA)
- Address 1 & 2, City, State, & Zip code
- Phone Numbers
- Social Security Number (SS #)
- Birthdate, Decade, & Age
- Gender
- Referred by
- Referred Practice
- General (Gen) Dentist
- Additional Doctor
- Occupation & Employment
- Emergency Contact
- Spouse
- Guarantor
- Legal Guardian
- Other Contact
- Email Addresses
- Insurance Note
- Patient Portal Credentials
- Infograbber Preferred Language
- Correspondence Preference (checkboxes)
- Appointment setup call (checkboxes)
- Do not schedule & Do not ever treat again (DNETA) (checkboxes)
- Deceased Patient (checkboxes)
- Lecture & Board (checkboxes)
- Outcome Case, Export, & Implant (checkboxes)
- Remove Patient
- Related KBs
Patient Picture
Method 1: Copy Image and Click into Window to PasteThis option is the same instructions that patient image window provides when first creating a new patient.
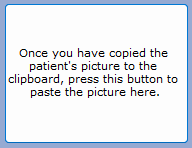
Method 2: Adding Photo into TDO through Acquire
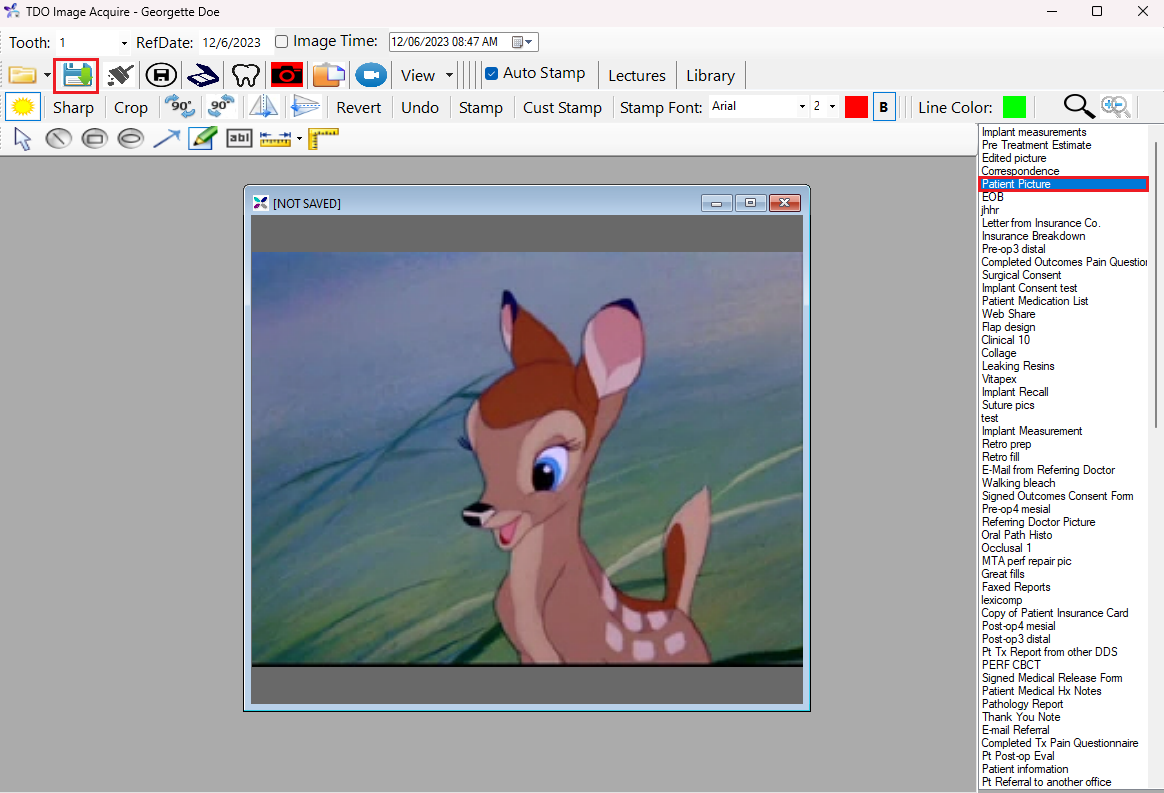
Method 3: Recategorize Existing Photo from Image Organizer
|
|
Right-Click Options (Copy, Paste, Paste Default Image, & Delete Image) |
|
 |
Right-clicking on the Patient Picture gives you the option to copy the existing image or paste a new one. You may elect to use a generic default image by clicking Paste Default Image as shown to the left. Further, the patient picture can be deleted by selecting Delete Image, however, once it is deleted it cannot be retrieved and will be removed from the Image Organizer permanently. |
Referred Date
The Referred Date is generated from the corresponding field of the same name when registering a patient. From the Patient page, this field cannot be edited. If the date needs correcting, you can do so in Patient Tools > Patient Referral.

Patient ID
The patient ID is an auto-generated number in sequential order relative to when the patient's profile was created in the TDO software. Patient ID's cannot be edited or changed.
|
Right-Click Option Right-clicking on the patient ID field will give you the option to use Lookup Value to search patients by their IDs. For detailed steps on how to do this, please visit the following linked article: [v12] Right-Click options. Tip: Use Lookup Value to search by patient ID |
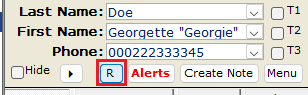
Chart Number (#)
The Chart # field by default, will be empty unless a 3rd party database import is performed or the MDToolbox eRX patient demographic ID is completed. If not being used by one of the two previously listed options, it will remain empty.
Tip: Notating Duplicate Patients
Assuming Chart # is not in use, it can be used to notate that the current patient profile is or has a duplicate profile.
|
Right-Click Options For detailed steps on how to use any of the below right click options please visit the following linked article: [v12] Right-Click options. Patients with multiple teeth/ cases will show up multiple times for View Cases for Current Value and View Cases for Specified Values.
|
First, Middle, & Last Name
|
Right-Click Options All three fields have the below options. For detailed steps on how to use any of the below right click options please visit the following linked article: [v12] Right-Click options. Patient's with multiple teeth/ cases will show up multiple times for View Cases for Current Value and View Cases for Specified Values.
|
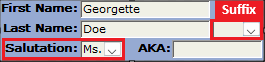
Suffix & Salutation
|
Right-Click Options
For detailed steps on how to use any of the below right-click options, please visit the following linked article: [v12] Right-Click options. Patient's with multiple teeth/ cases will show up multiple times for View Cases for Current Value and View Cases for Specified Values.
|
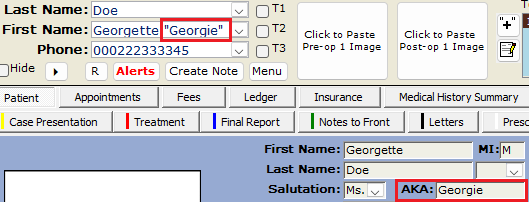
Alternative Name (AKA)
|
Right-Click Options For detailed steps on how to use any of the below right click options please visit the following linked article: [v12] Right-Click options. |
Address 1 & 2, City, State, & Zip code
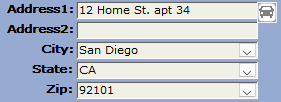
Directions to Address 1 in Google Maps
By clicking on the icon of a car to the right of Address 1 TDO will open Google Maps directions in your default internet browser between the patient's Address 1 to your office's location which is set in Setup > Site Configuration > Edit Control Table > Practice Information > Practice Street Address1.|
Right-Click Options All of these address related fields have the below options. For detailed steps on how to use any of the below right click options please visit the following linked article: [v12] Right-Click options. Patient's with multiple teeth/ cases will show up multiple times for View Cases for Current Value and View Cases for Specified Values.
|
Phone Numbers
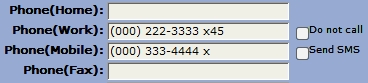
Do Not Call
Do Not Call is an available checkbox in case the patient has indicated that they do not want the office to contact their work.
Send SMS
If your office uses TDO Comms, or the older TDO SMS, in order to be able to text a patient you'll first have to mark off the checkbox Send SMS on the Patient page.
|
Right-Click Options All of these address related fields have the below options. For detailed steps on how to use any of the below right click options please visit the following linked article: [v12] Right-Click options. Patient's with multiple teeth/ cases will show up multiple times for View Cases for Current Value and View Cases for Specified Values.
|
Social Security Number (SS #)
A patient's social security number can be added on the Patient page in the field SS#. By default the social security number while be hidden with asterisk symbols "***." To view it check the box to the left labeled as Show.

|
Right-Click Options For detailed steps on how to use any of the below right click options please visit the following linked article: [v12] Right-Click options. Patient's with multiple teeth/ cases will show up multiple times for View Cases for Current Value and View Cases for Specified Values.
|
Birthdate, Decade, & Age
A patient's date of birth (DOB) can be added on the Patient page in the field Birthdate; this will populate the age of the patient within the Age field. To the right of Birthdate is the Decade field that automatically updates based on today's date and the patient's DOB to reflect what decade of life they are in. For example, someone born in 2001 is 22 years old in the year 2023 because they have been alive for 20 years (2 decades) + 2 years (the PT is in their 3rd decade) = the Decade field will show as 3 decades for this patient.
|
Right-Click Option Right-clicking on the Birthdate field will give you the option to use Lookup Value to search patients by their dates of birth. For detailed steps on how to do this please visit the following linked article: [v12] Right-Click options. |
Gender

Referred by
The Referred by field is used to track the name of the doctor who referred the patient to your office. If the referring doctor has already been added into TDO, you can either use the dropdown to locate the doctor or begin typing the last name of the doctor and the system will auto populate the rest of their name. Details and contact information for the referring doctor can be located by clicking the i button which opens the Doctor Information window . If this patient is the first referral from the doctor you'll need to add them into your TDO by following the below steps.

Adding a new Referring Doctor (+)
- Click the plus sign icon (+) icon to open the Referring Doctor Information window
- Optional: If applicable, check the Both box to notate the doctor is both the general dentist and the referring doctor. If not, leave it marked as Referring
- Enter applicable information
- Use the Door and Arrow icon in the top right corner to save and close
- From the Referred by dropdown select your newly added doctor
Directions to patient's Address 1 to referring doctor's preferred address in Google Maps
By clicking on the icon of a car to the right of Referred by TDO will open Google Maps directions in your default internet browser between the patient's Address 1 to the referring doctor's preferred address listed in the Doctor Information window.
|
Right-Click Options For detailed steps on how to use any of the below right click options please visit the following linked article: [v12] Right-Click options. Patient's with multiple teeth/ cases will show up multiple times for View Cases for Current Value and View Cases for Specified Values.
|
Referred Practice
The Referred Practice dropdown automatically populates with the practice location(s) associated with the referring doctor listed in the Referred by field. If the referring doctor has multiple practices associated to their name, you'll have to manually select which one to show for the patient from the drop down list.
![]()
General (Gen) Dentist
The Gen Dentist field is used to track the name of the patient's general dentist. If the general dentist has already been added into TDO, you can either use the dropdown to locate the doctor or begin typing the last name of the doctor and the system will auto populate the rest of their name. Details and contact information for the general dentist can be located by clicking the i button which opens the Doctor Information window . If the patient is the first at your practice to use this specific general dentist you'll need to add them into your TDO by following the steps below.

Adding a new General Dentist (+)
- Click the plus sign icon (+) to open the Referring Doctor Information window
- Optional: If applicable, check the Both box to notate the doctor is both the general dentist and the referring doctor. If not, leave it marked as General
- Enter applicable information
- Use the Door and Arrow icon in the top right corner to save and close
- From the Additional Doctor dropdown, select your newly added doctor
|
Right-Click Options For detailed steps on how to use any of the below right click options please visit the following linked article: [v12] Right-Click options. Patients with multiple teeth/ cases will show up multiple times for View Cases for Current Value and View Cases for Specified Values.
|
Additional Doctor
The Additional Doctor field is an extra field used if the patient has another doctor that needs notating. If the doctor has already been added into TDO, you can either use the dropdown to locate the doctor or begin typing the last name of the doctor and the system will auto populate the rest of their name. Details and contact information for the doctor can be located by clicking the i button which opens the Doctor Information window . If the patient is the first at your practice to use this specific doctor you'll need to add them into your TDO by following the below steps.
Adding a new Additional Doctor (+)
- Click the plus sign icon (+) icon to open the Referring Doctor Information window
- Enter applicable information
- Use the Door and Arrow icon in the top right corner to save and close
- From the Gen Dentist dropdown, select your newly added doctor
|
Right-Click Options For detailed steps on how to use any of the below right click options please visit the following linked article: [v12] Right-Click options. Patient's with multiple teeth/ cases will show up multiple times for View Cases for Current Value and View Cases for Specified Values.
|
Occupation & Employment
The patient's occupation and employment information can be located in the Occupation dropdown and the Employer Name and Employer Address fields.

|
Right-Click Options
For detailed steps on how to use any of the below right click options please visit the following linked article: [v12] Right-Click options. Patient's with multiple teeth/ cases will show up multiple times for View Cases for Current Value and View Cases for Specified Values.
|
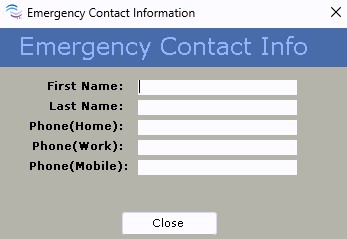
Emergency Contact
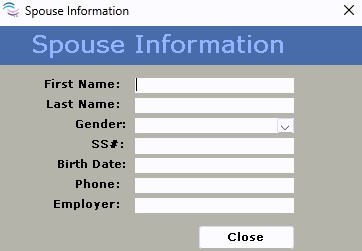
Spouse
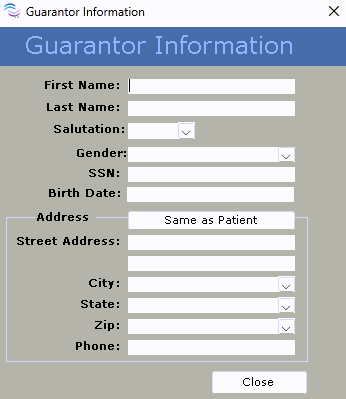
Guarantor
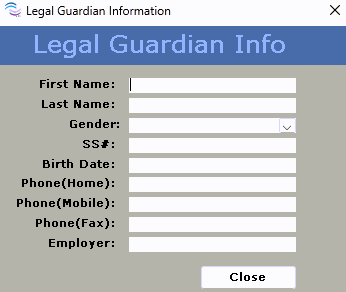
Legal Guardian
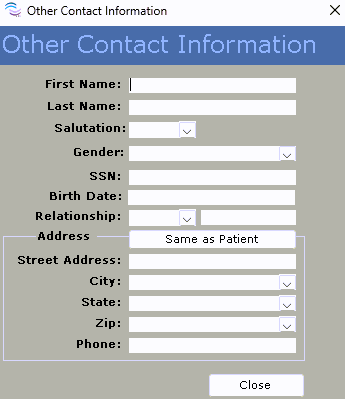
Other Contact
Email Addresses

|
Right-Click Options For detailed steps on how to use any of the below right click options please visit the following linked article: [v12] Right-Click options. |
Insurance Note
The Insurance Note is an available field should your office like to add a brief message on the Patients page about the patient's insurance.
![]()
If you'd like to add a longer note than what this field has available, we'd recommend utilizing the Notes box in the bottom right corner of the Insurance page.
Patient Portal Credentials
For TDO Cloud users, setting and viewing patients' Patient Portal website credentials is possible from the Patient page in fields Web ID (username) and Web Password.
Web ID
To create a new Web ID for a patient simply click the Generate button to the right of the field and TDO will create a username for the patient.
Web Password
Within newer versions of TDO there are two available options for the Web Password.
Option 1: Office cannot view or edit passwordOption 2: Office can view and edit passwordSteps to switch between Options 1 & 2The following steps will switch the available option for all Patient pages system wide.
Greyed out buttons
If any of the buttons mentioned in the above steps are greyed out then the current user profile logged into TDO does not have the appropriate permission privileges to make these adjustments. Either a user with these privileges will have to update the User Roles for the user profile where the button is greyed out or a user with the privileges will need to complete the steps. |
Infograbber Preferred Language

The field Preferred Language for Infograbber/ Web is an optional field that can be made available or hidden depending upon your office's needs. By default the language will be English, updating this field will only update the Infograbber application and Infograbber website for the currently selected patient. There are six available language options: English, French, French-Canada, German, Portuguese, and Spanish. Due to the custom nature of TDO not all forms will translate, translated forms include: Patient Registration, Insurance Card, Short Form Medical History, Prescribed Medications, and Pain History.
Medical History long form, custom Medical History questionnaires, and Consent/ Policy forms do not translate with this field.
- Custom Medical History forms can be manually translated by your office using the instructions provided in KB #100, linked here.
- Consent and Policy forms also will not be translated; steps to add a manually translated form are provided in KB #31, linked here.
Add or remove Preferred Language field
The following steps will add or remove the Preferred Language for Infograbber/Web from the Patient page system wide.
- Go to Setup
- Site Configuration dropdown
- Select Edit Control Table
- Open the Application Settings tab
- Under the Medical History section
- Check or Uncheck the box next to Show Pref. Language on Patient Chart to add or remove the dropdown field Preferred Language for Infograbber/Web from the Patient page
- Close to save updates
If any of the buttons mentioned in the above steps are greyed out then the current user profile logged into TDO does not have the appropriate permission privileges to make these adjustments. Either a user with these privileges will have to update the User Roles for the user profile where the button is greyed out or a user with the privileges will need to complete the steps.
Correspondence Preference (checkboxes)
Letters templates have the ability to have their default send option set to the check box marked under the patient's Preferred Correspondence via field.
Appointment setup call (checkboxes)
![]()
The checkboxes Patient will call to set up appointment and Need to call patient to set up appointment can be used to track unscheduled needed appointments. To see a list of patients corresponding to these checkboxes go to Reporting Tools > Administrative > Patients Needing and Appt > select the information you'd like to see, either Patients Needing an Appt - Need to Call or Patients Needing an Appt - Will Call Us.
|
Right-Click Options For detailed steps on how to use any of the below right click options please visit the following linked article: [v12] Right-Click options. Patient's with multiple teeth/ cases will show up multiple times for View Cases for Current Value and View Cases for Specified Values.
|
Do not schedule & Do not ever treat again (DNETA) (checkboxes)

The checkbox Do Not Schedule is recommended for notating that a patient owes money that must be paid prior to an appointment being scheduled. The checkbox DNETA, standing for "Do not ever treat again," is recommended when a patient has been banned from the practice.
|
Right-Click Options For detailed steps on how to use any of the below right click options please visit the following linked article: [v12] Right-Click options. Patient's with multiple teeth/ cases will show up multiple times for View Cases for Current Value and View Cases for Specified Values.
|
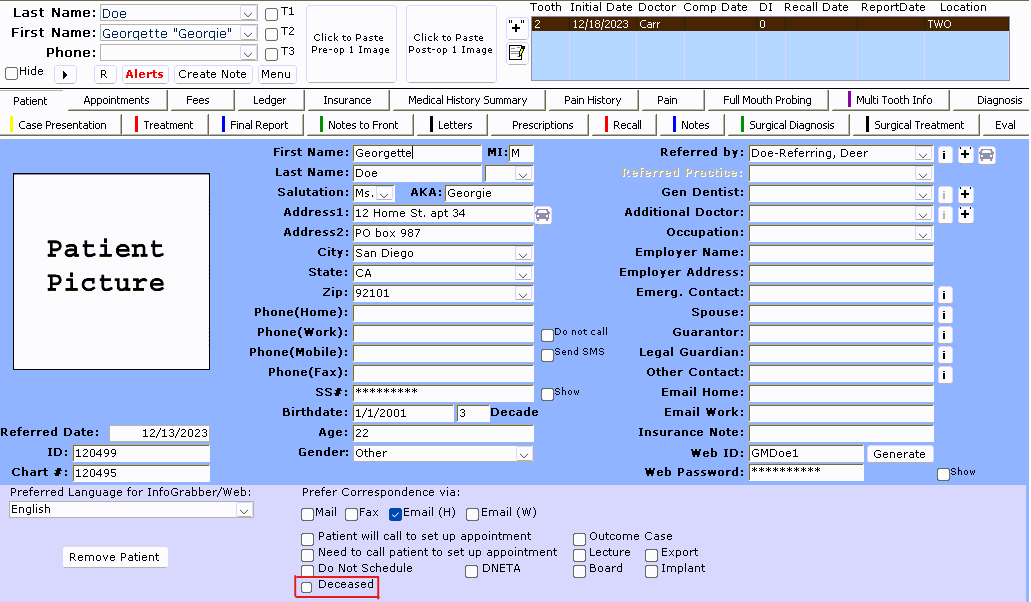
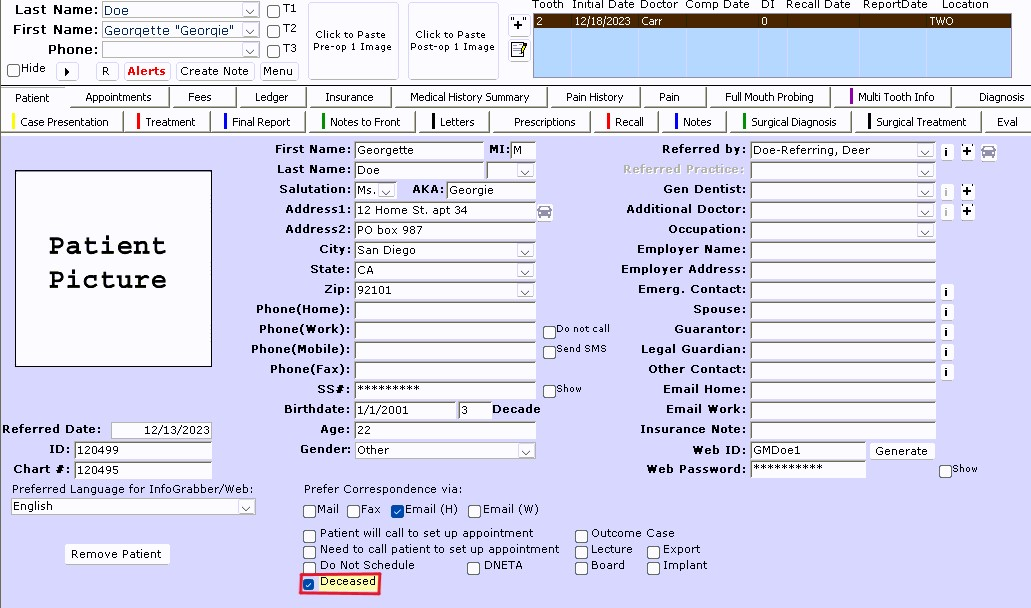
Deceased Patient (checkboxes)
The checkbox Deceased is to notate that the patient has passed out. When this is checked off the Patient page color will update slightly to visually show this has been checked.
|
Right-Click Options For detailed steps on how to use any of the below right click options please visit the following linked article: [v12] Right-Click options. Patient's with multiple teeth/ cases will show up multiple times for View Cases for Current Value and View Cases for Specified Values.
|
Lecture & Board (checkboxes)
|
Right-Click Options For detailed steps on how to use any of the below right click options please visit the following linked article: [v12] Right-Click options. Patient's with multiple teeth/ cases will show up multiple times for View Cases for Current Value and View Cases for Specified Values.
|
Outcome Case, Export, & Implant (checkboxes)
The checkboxes Outcome Case, Export, and Implant can be used alongside the right click query reports.
|
Right-Click Options For detailed steps on how to use any of the below right click options please visit the following linked article: [v12] Right-Click options. Patient's with multiple teeth/ cases will show up multiple times for View Cases for Current Value and View Cases for Specified Values.
|
Remove Patient
The Remove Patient button will completely delete a patient from the TDO database. The patient must have a zero balance on the Ledger page and the teeth must be deleted prior to removing the patient otherwise it will not work. If you are removing a duplicate patient's chart, make sure to copy any information you want into the chart you are keeping. This includes notes and X-rays.