Software Token (VIP Access app)On the App Store (iOS) or Google Play Store (Android), download VIP Access from Symantec VIP. This application is free. |
 |
Overview
Eprescription (eRx) is a service through MDToolbox that provides an electronic prescribing platform and is fully integrated into TDO. Many states have existing laws, or laws that will soon go into effect, requiring certain types of medications (in some states all prescriptions) to be prescribed electronically.
With eRX, prescriptions can be created by any TDO user, but only doctors with authenticated tokens will have the ability to electronically submit controlled substances to pharmacies directly from TDO.
There are two options for verification when submitting controlled substances. You must choose one or the other. (Most offices use the VIP Access app for iOS or Android).
Software Token (VIP Access app)On the App Store (iOS) or Google Play Store (Android), download VIP Access from Symantec VIP. This application is free. |
|
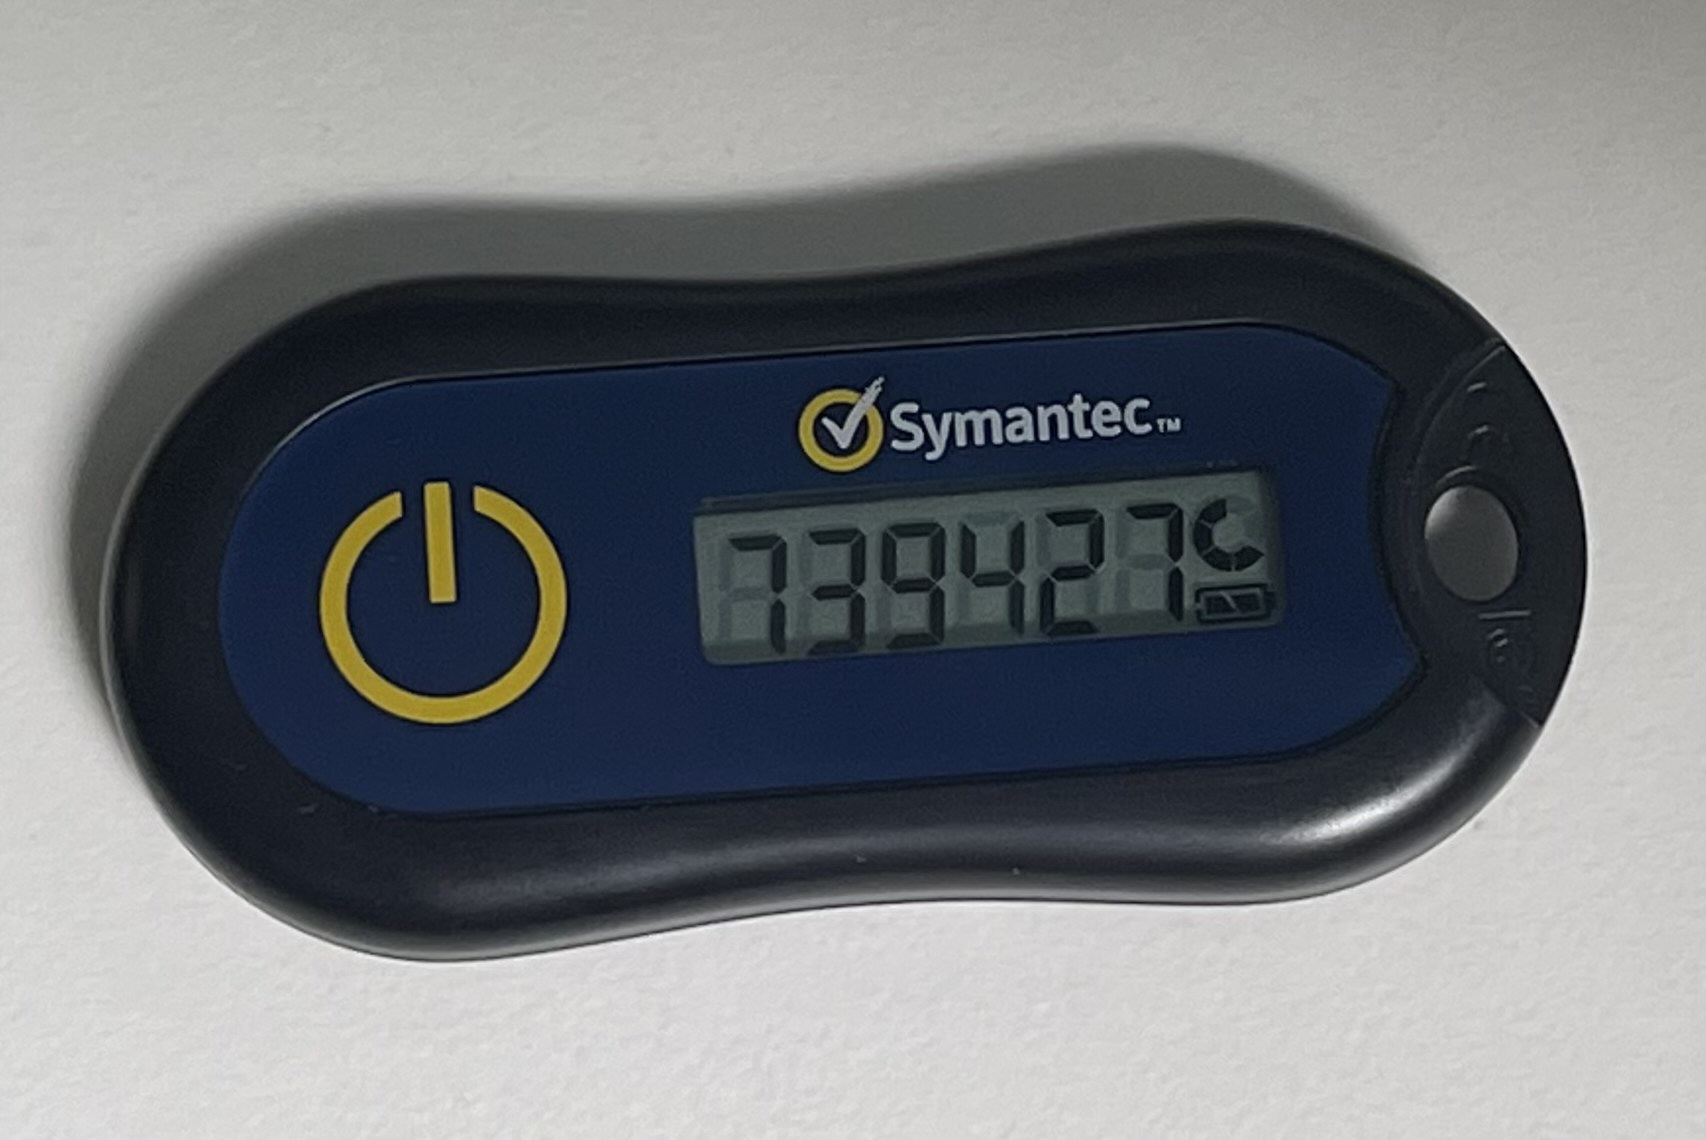
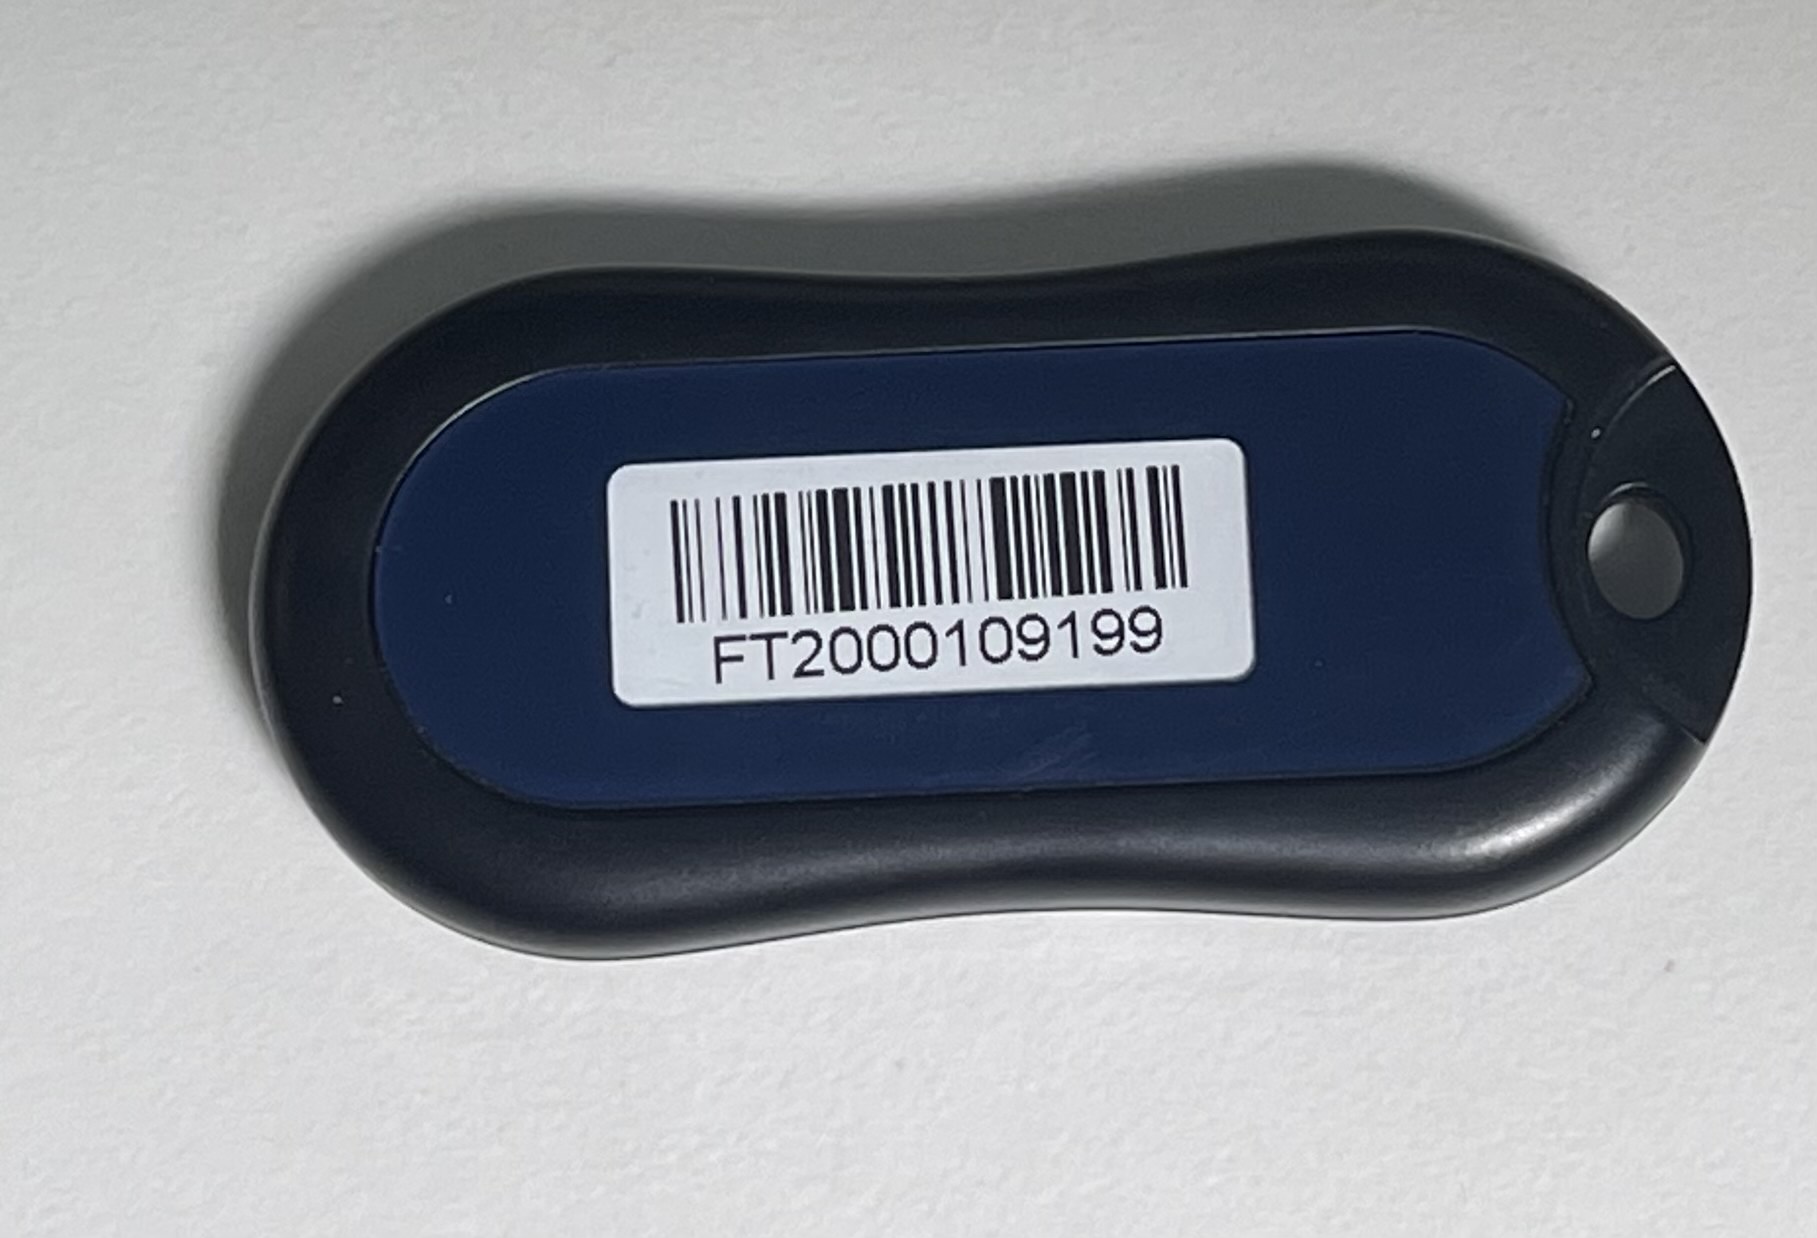
Hardware Token (Symantec VIP key fob)Note: As of 1/1/2023, Hardware Tokens using the Semantic Key Fob can only be ordered after the Doctor is established in the system with a Software Token. Alternatively, you can use the Symantec VIP key fob.
Effective Date: August 20, 2020 Warranty Update: Warranty on all tokens going forward will be 30 day guarantee (replacement only/no refunds). Symantec/Broadcom does not guarantee the device nor the battery for more than 30 days. If you receive a token that is nonoperation please reach out for warranty prior to 30 day for replacement. |
  |
You can check what version of TDO you are running by clicking [Help > About TDO/Submit Ticket] and looking at your application/revision number. If you are using an earlier version of TDO, you must update to a compatible version before eRx setup can be scheduled.
There is a one-hour training/setup required before you can start using eRX (practices with multiple doctors will require one training session per doctor). The doctor must be present during the duration of the training. If you are interested in signing up for eRx, follow the steps here - Electronic Prescriptions (eRx) - How to Sign Up and Schedule Training
There is a one-time $275 initial setup fee per doctor.
Use the TDO Services Pricing Calculator to see how billing will be updated.
The doctors have the option to use the free iPhone/ Android app, Symantec VIP Access, and/or purchase a key fob ($55, non-refundable). Please contact us to purchase a key fob and allow 1 week for delivery to your office.
Note: TDO Support staff will be walking you through this portion of the setup.
Note: If you are already signed up with ERX through TDO, do not create a new USER account in TDO. Each Prescriber login has a unique ID tied to the prescriber NPI and DEA numbers.
1. Check your version of TDO. If your version is older than 12.320b, you will need to add an entry to the TDO.ini file. Navigate to C:\Program Files (x86)\TDOffice (or C:\Program Files\TDOffice if using an x86 computer). Open the file called TDO.ini and add a line that says eRxEnable=YES (case sensitive), preferable under the ‘Version’ line. Save and close TDO.ini.
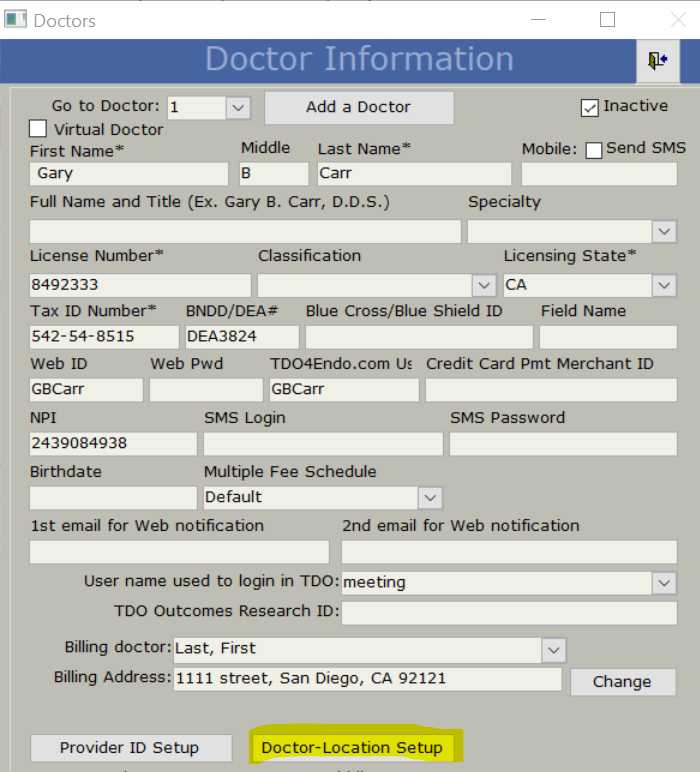
2. Navigate to the Doctor Information screen in TDO. In Version 12: Setup > Site Configuration > Edit Doctor Information. In Version 11: Administrative > Edit Doctor Information. The following fields are required to have an entry:
The ‘User name used to login in TDO’ should be the user that the doctor signs in as. It is important that only the doctor uses that user name.
Note: MDToolbox, the company that furnishes the eRx service, checks provider information against the information that is registered with their NPI. If the provider is using different information in TDO, MDToolbox may not be able to authenticate them. Contact TDO Support if you have any questions about this.
3. Click on Doctor-Location Setup. Each provider must have an entry for each location, each of which must have the ‘eRx Enabled’ box checked.
4. Check the doctor’s username permission. In Version 11: Administrative > Add/Edit User Names and Passwords. Go to the provider’s user name and make sure the provider has Full Control set for eRx permission.
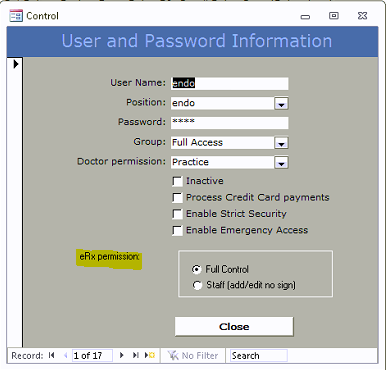
In Version 12, this attribute is built into the User Roles menu. Open Setup > Site Configuration > Add/Edit User Names and Passwords. Make sure you are on the User Roles tab, then click “Edit Roles”.

Make sure you have the Full Access role highlighted, and then click Functions. Highlight all the eRx functions (can hold CTRL + click, or use the “Select All” box at the bottom) and click Add >>. If there are no eRx functions showing in the left column, this step has likely already been completed. Click OK to close out of the window.
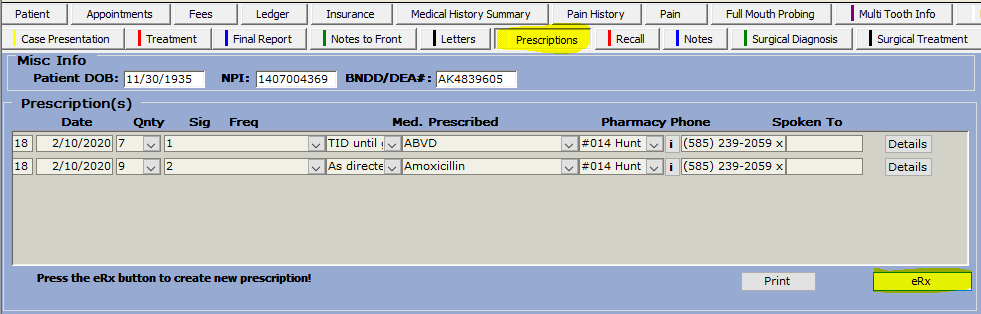
5. Make sure the doctor is logged in to TDO. Go to the prescriptions tab and click the eRx button. You should get a message welcoming you and asking you to setup eRx. Click OK, then read and agree to the terms of use on the next few windows.

6. Enter your personal credentials in this window. Please use your personal NPI, not the practice NPI.
If the NPI does not match what is on file, have the doctor go to https://nppes.cms.hhs.gov/?forward=static.npistart#/ and update their info. It usually takes a few business days to update in the NPI database.

7. The next step is Identity Proofing (which is done through Experian). You’ll be asked to enter personal/contact information, and then answer questions about your credit history in order to verify your identity. Make sure to enter a phone number that you have access to in the ‘Personal Cell Number’ field.
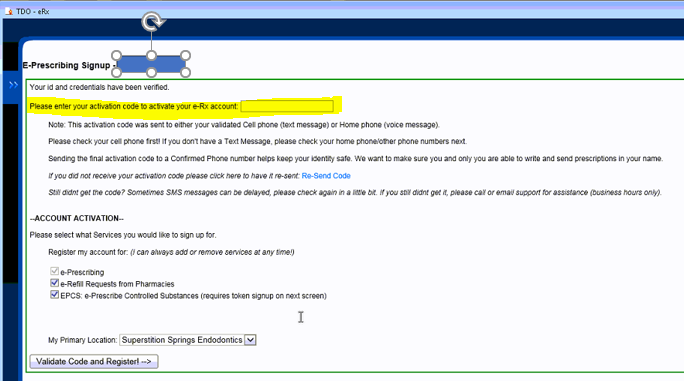
8. Once your credentials are verified, you will receive an activation code. This activation code is sent to the phone number that you used to register for your NPI (via text message if your cell number is validated or a message on your home phone if that number was validated). Once you have the activation code, enter it and click Validate Code. If you did not receive an activation code, click Re-Send Code.
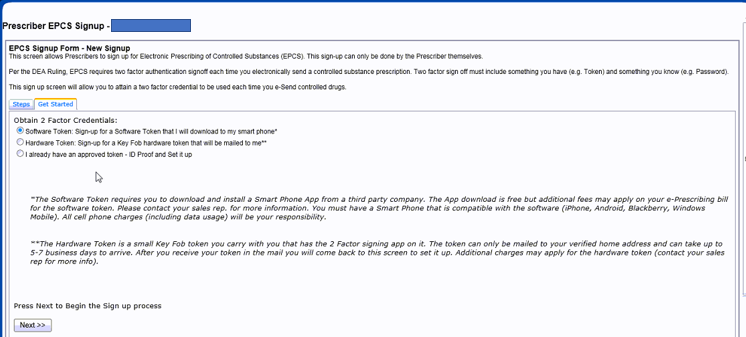
9. If you plan to e-send controlled substances, at this point you have the option to set up your Electronic Prescribing of Controlled Substances authorization. If you intend to do so, click “Yes, start the signup process for EPCS”.

Click on Get Started, then choose whether you will be using a software token (smartphone), or hardware token (key fob).
Follow these steps if you plan to electronically submit controlled substances. Make sure you have downloaded VIP Access app by Symantec if you plan to use your smartphone.
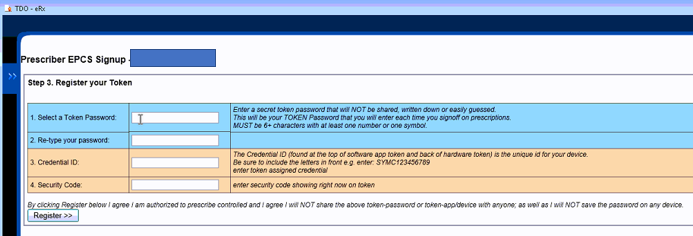
1. Read and agree to the terms and conditions. You will be taken through another verification window. After you are verified again, please click the option to register your token.
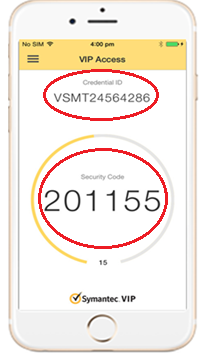
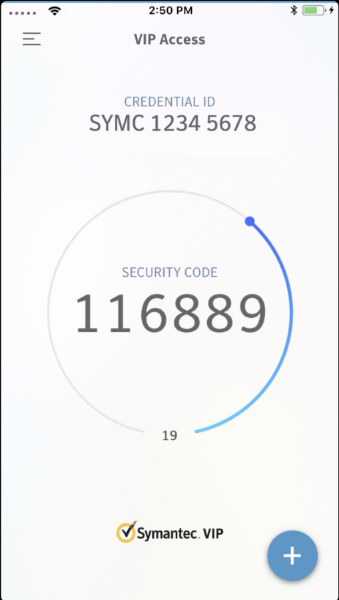
2. On the next screen, you will choose a password that you will use when submitting controlled substances. Is it strongly recommended to use a combination of letters, numbers, and special characters for security. Please enter this password on the first two lines. On line 3, please enter the Credential ID (starts with ‘SYMC’) from the VIP Access app or your key fob. Line 4 is the security code currently showing on your app/fob. This will change every 30 seconds so you might have to wait for it to refresh.
Here is what the app interface looks like:
3. After you have clicked Register, click finish/close on the next window. You will be taken back to the home screen:
You should soon receive an additional verification code. In most cases, this code will be delivered by an automated call from Experian (to the phone number provided during Identity Proofing). In rare cases if no phone number is listed, the code will be mailed to your home address. Once you have entered the code, click Activate. Click Access Control-Set Permissions next.
Per the DEA rule for Controlled Substance Access Control, two users are required in order to save changes to this screen. You must get a second user that will authorize the changes. One of the users must be a Prescriber who has signed up for EPCS and can sign off on the changes with their Two Factor Credentials. The other user can be any user who has been added to the account that has Admin permissions. This does not need to be a prescriber; it can be an assistant, office manager, etc.
4. Please have a trusted staff member with eRx permissions log into TDO. The staff permissions can be adjusted according to step 4 of the initial setup. In Version 11, the staff member must have Full Control for eRx permission. In Version 12, the staff member must have at least “eRx - admin only” under the user roles functions.
5. Go to the Prescriptions tab in TDO, and click the eRx button. Click the 2 chevrons on the left side, and then go to Setup & Tools and click Practice Setup.
6. Click on the Settings tab and then Open Access Control.
7. In the top dropdown menu, select the prescriber who will be approving the changes. In the second box, select the staff member logged into TDO with eRx permissions.
8. In the grid at the lower section, check the box for each user who will have permissions or help with managing EPCS. Please make sure all 5 boxes are checked for the doctor.

9. Click Save to save your changes. This will pop up a two-factor authentication window. Please have the doctor enter in their eRx password created, as well as the security code currently present on the app/fob. Click Sign and Authorize. You are now ready to submit controlled substances!
You may wish to set up your ‘favorite’ (most frequently prescribed) medications in order to save time.
Disclaimer: MDToolbox has introduced a cleanup function in their system - Prescribers who have left prescriptions in a pending state (not e-sent, printed or marked as historical) will have pending rxs automatically cleaned up/removed if the rx is dated more than 2 weeks ago. A pending rx is a medication that was written but never completed or given to the patient.
Refills may be requested by pharmacies and will show up under "Alerts & Messages." Email alerts can also be set up:
Article ID: 334
Created: July 16, 2015
Last Updated: June 8, 2026
Author: TDO KB [web_admin@tdo4endo.com]
Online URL: https://kb.tdo4endo.com/article.php?id=334