[v12] Notes page
Estimated Reading Time: 7 MinutesOverview
The Notes tab allows you to show or hide auto-populated and manually entered notes for the currently opened patient and distinguish between whether the note should be related to a Tooth or the Patient.
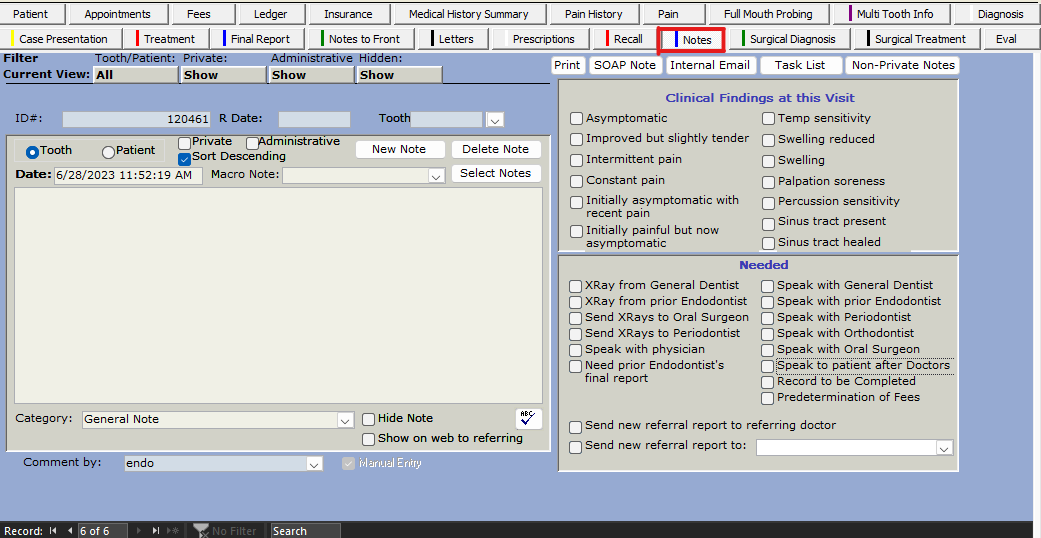
Table of Contents
Filter Current View

Notes have filter settings that can be changed by clicking on them. The filters are located in the top left corner of the Notes tab. The filters are:
Tooth/ Patient = Patient, Tooth, Both (only shows selected tooth), or All (shows both but for all teeth)
Private = Show, Hide, or Only
Administrative = Show, Hide, or Only
Hidden = Show, Hide, or Only
To see everything you can set them to...
Tooth/ Patient = All
Private = Show
Administrative = Show
Hidden = Show
Once the filter is set as desired, use the arrow buttons at the bottom to go through the notes.
Changing the viewed Note (“Record”)

Each new note will add to the “Record” tally found at the bottom left of your TDO. To change the note being viewed, simply click the left or right arrow.


Creating a New Note
Note: Some notes are automatically created from other parts of the TDO program as a page summary. For manually entered notes, the Category should be left as “General Note.”
To create a new note you can use the arrow with a star/asterisk behind it at the bottom left of your TDO. Or create a new Note by selecting the “New Note” button.

- Next mark the note as a Tooth or Patient note.
Tooth = note refers to specific tooth
Patient = note refers to the patient, not a specific tooth
- If applicable, select the Tooth number (#) using the Tooth dropdown.
- Next, to add the note text there are three options.
Option 1) manually type it
Option 2) click “Select Notes” to choose from a list of pre written notes - for more details on see below
Option 3) use the drop down to the right of “Macro Note” to select a prewritten note - for more details see below
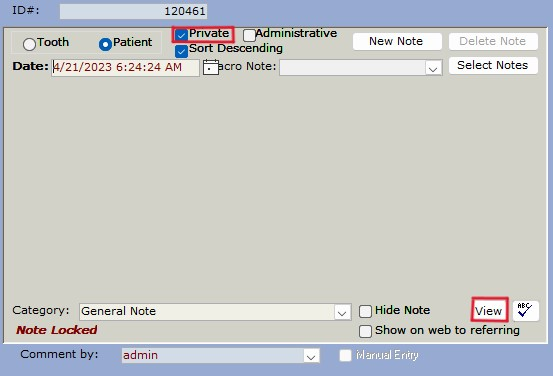
- If applicable, mark the note as Private and/or Administrative.
Private = this will hide the note’s text body. To view the note and keep the Private setting, you’ll click the View button. This will allow you to temporarily view the note.
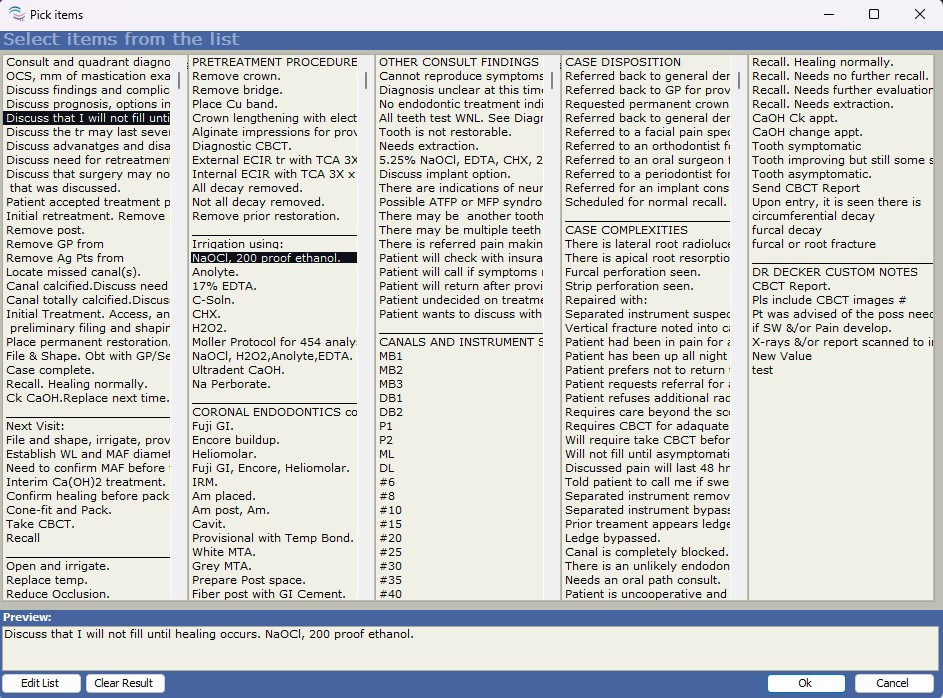
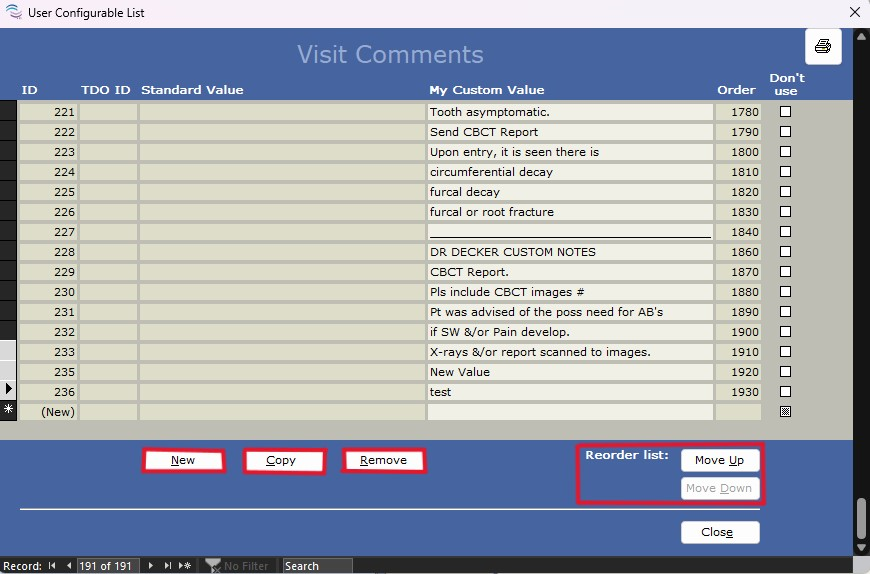
Select NotesNote: “Select Notes” can only be used with new or modifiable notes prior to a note being locked. This tool permits multi-selection from the items within its list - a preview of your selected items is available at the bottom of the window. To add them to your note click “OK.” To delete all previously selected items and start from scratch, click “Clear Result.”
Edit List To reorder, add, remove, or inactivate an item from the list click “Edit List” at the bottom left.
To select an item row click on the far right brown/black box, once it has been selected the box will turn grey with an arrow. To multiselect, hold down the shift key and click the last row you want to select - all selected lines will now have a grey box next to them.
New = add a new line item, only the “My Custom Value” field in white is editable. Close to save. |

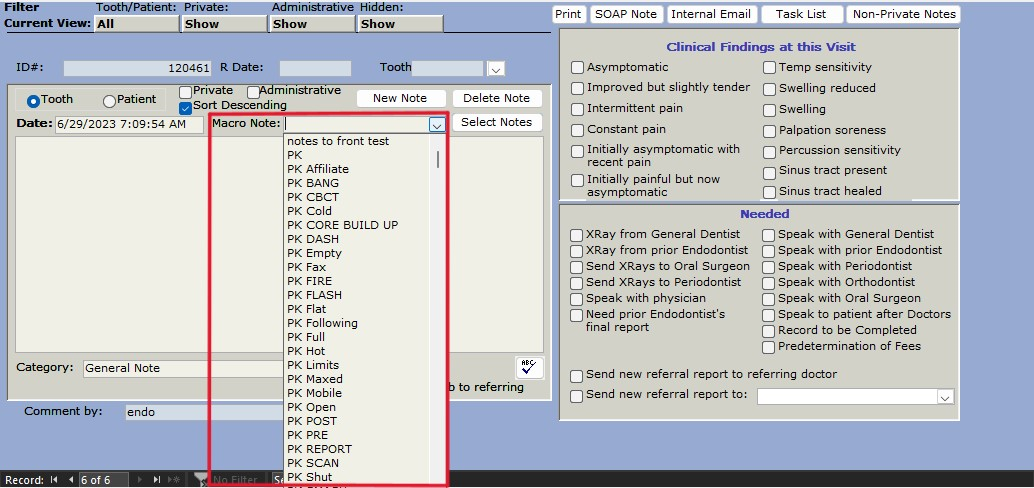
Macro NoteNote: “Macro Note” can only be used with new or modifiable notes prior to a note being locked. Similar to “Select Notes,” “Macro Note” allows you to choose from a list of pre-made notes. However, the drop-down will only show the title and not the full text. Once an item from the list is selected, the text will populate into the text box.
Edit ListTo add, edit, or remove an item from the list right-click on the drop down arrow and click “Edit List.”
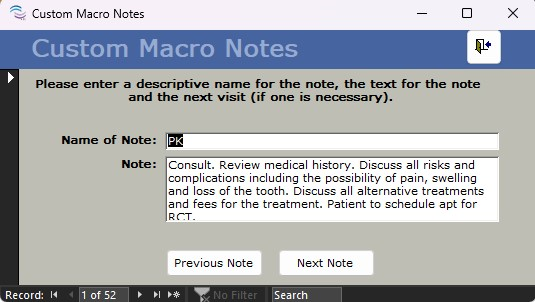
To add a new Macro Note click the right arrow with a star/ asterisk behind it. This will create a new blank record. Close to save.
To edit an existing Macro Note use the bottom left “Record” arrows or “Previous Note” and “Next Note” to scroll through all your Macro Notes till you locate the one you’d like to edit. Close to save. To delete a Macro Note click on the far right brown/black box, once it has been selected the box will turn grey, next click Delete on your keyboard. A pop-up window will appear asking for you to confirm “Yes” you’d like to delete or “No” you do not want to. |


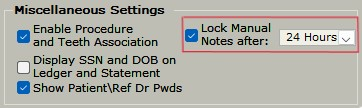
Updating manually entered Note lock time period
The amount of time before a manually entered note is locked defaults to 24 hours; this can be edited to either 24 hrs, 48 hrs, 72 hrs, 1 wk, 2 wks, 1 month, 2 months, or 3 months. To edit it, please use the steps below.
- Setup
- Site Configuration
- Edit Control Table
- Application Settings
- Miscellaneous Settings
- Lock Manual Notes after
- Use the drop-down to select the desired time frame to lock notes
Note: Locked notes cannot be deleted or edited.
Lock time cannot be changed for TDO generated Notes
For HIPPA compliance the lock period for TDO generated notes cannot be customized or edited. Extending the lock period is only for manual notes, it will not apply to notes generated through TDO.
Additional Tab Features

This will allow you to print all (private and non-private) notes associated with the patient. To print, either right-click and select “Print” or simultaneously click CTRL+P on your keyboard.
SOAP Note
SOAP = Subjective, Objective, Assessment and Plan
This button will open up Letters, if you have created a Letter Template for SOAP then you can apply or update it by following the below instructions. Once applied clicking the SOAP Note button will open the template in Letters.
- Setup
- Site Configuration
- Edit Control Table
- Application Settings
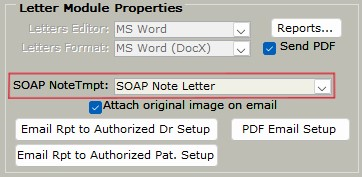
- Letter Module Properties
- SOAP NoteTmpt:
- select desired template to be used for SOAP Note
- close to save
Internal Email
This will send the currently open note as a new message using TDO’s Internal Email feature.
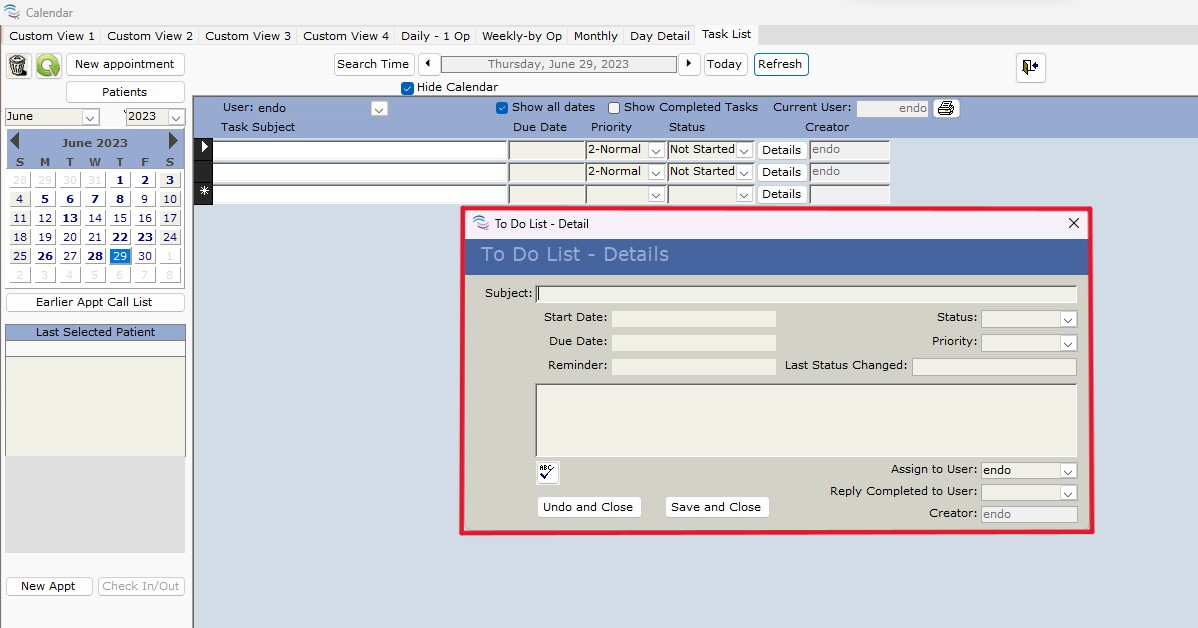
Task List
This will open the Calendar to the “Task List” tab, as well as the “To Do List - Detail" window where you can enter and assign a new future task.
Non-Private Notes
This will create a printable PDF of all notes that are not marked as “Private.” To print either right-click and select “Print” or simultaneously click CTRL+P on your keyboard.
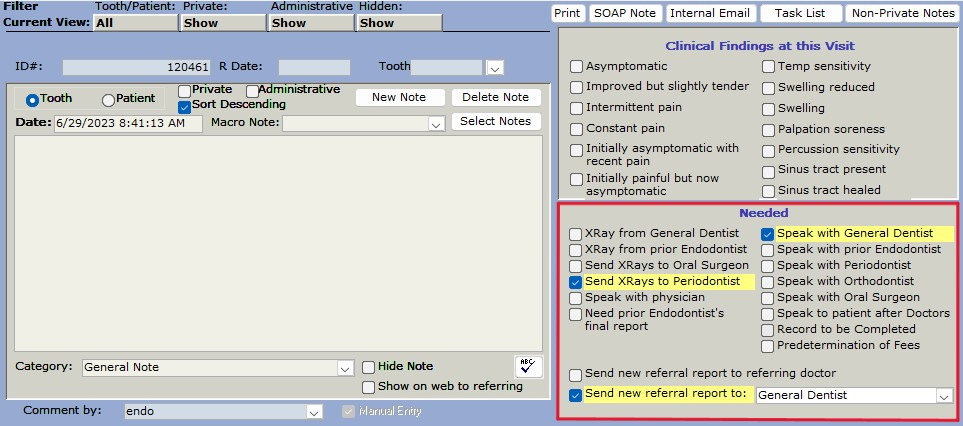
“Clinical Findings at this Visit” section
On the right side of the Note tab, there is a “Clinical Findings at this Visit” section. This is an optional section making it easy to document and view clinical findings for each appointment, once a line is checked it will highlight in yellow. When you are entering a note for the patient’s visit, simply click the findings that apply. The items you check will show as part of the patient note automatically.
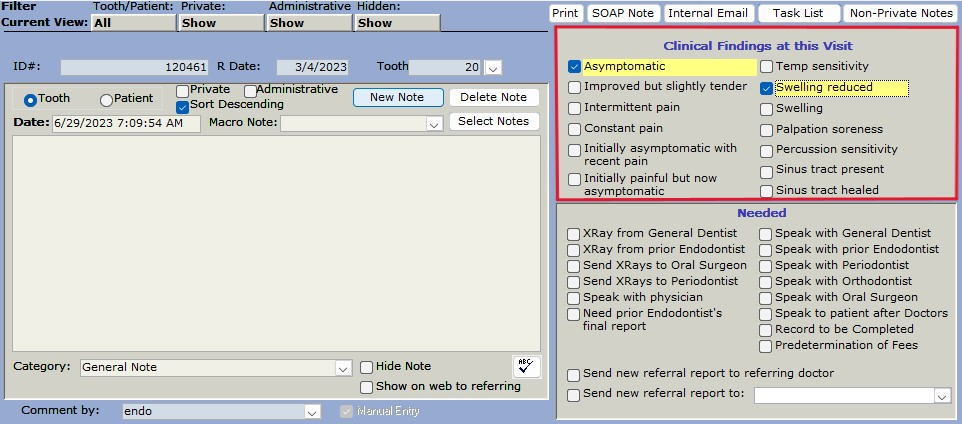
“Needed” section
On the right side of the Note tab, under “Clinical Findings at this Visit,” is the “Needed” section. This is an optional section where you can check off what needs to be done - once a line is checked, it will highlight in yello,w making it easy to view at a glance.