Adding a tooth
Estimated Reading Time: 2 MinutesOverview
Before any images or treatment pages can be used for a case, the tooth needs to be added to the patient’s chart.
To add a tooth, click the + button at the top of the patient’s chart. The rectangle on the upper right shows all of the teeth that have already been added to the patient’s chart.

Remember, you only have to add a tooth ONCE to the chart. All the treatment records for the course of treating that tooth go in the same tooth record. This applies if the patient has 1 appointment or 6.
However, the only time you would add the same tooth a second time is if you are retreating your own work and need a new diagnosis and new treatment page, or if a different doctor in your office is doing part of the treatment on the tooth as well.
When you click the ‘+’, a form comes up to pick the tooth number you wish to add, the treating doctor, as well as a date.
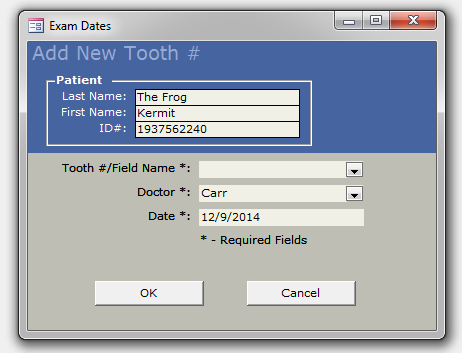
Tooth Number: If you are unsure of the tooth number, you can add the one you believe it might be, and it can always be changed to the proper number later without losing any information. You may also pick a quadrant value and then change to the proper number once it is determined.
Doctor: Having the proper treating doctor listed for a tooth is very important. All fees and future appointments will default to the treating doctor. If you make a mistake, and the wrong treating doctor is entered, it can be changed.
Date: The date a tooth is added to a patient’s chart is the ‘Initial Date’ that shows next to the tooth. This date is only important to keep it separate if the same tooth is added to the chart later. Do not be concerned with this date; it does not have to be the date of their first appointment.
When you are done filling out the form, click OK at the bottom. This will save the information and add the tooth to the patient’s chart. That new tooth will automatically be selected.
Note: Unfortunately, there is no merge function for duplicate tooth records in TDO. If you wish to consolidate the information, you will want to keep the tooth with the most complete information and manually copy missing details from the duplicate record. To remove the duplicate tooth: https://kb.tdo4endo.com/article.php?id=202