Overview
There has been a slight change in the way the XDR SDK Image Controls work in TDO 12.338f and higher. You can now choose, individually, whether to save your setting for each option.
Detailed Instructions
After taking an image in XDR, select this image, then click the ‘Image Controls’ button (the ‘half-moon’ icon to the right of the ‘Endo’ button in the XDR Image Processing row of buttons).

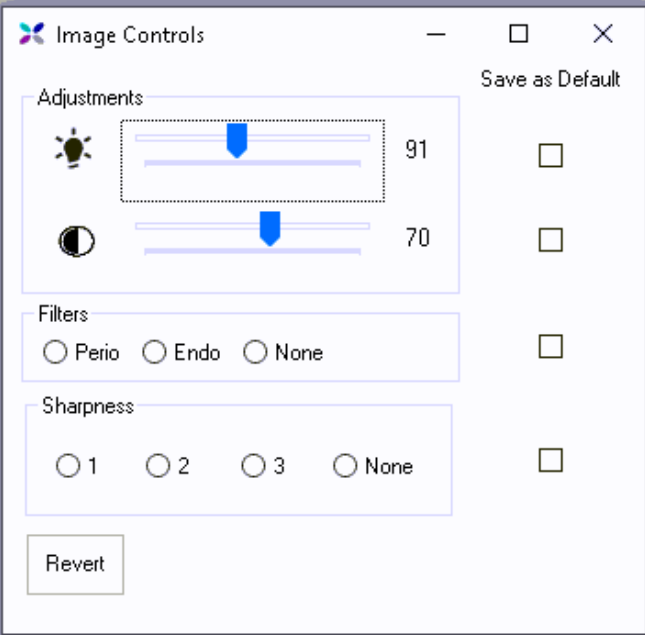
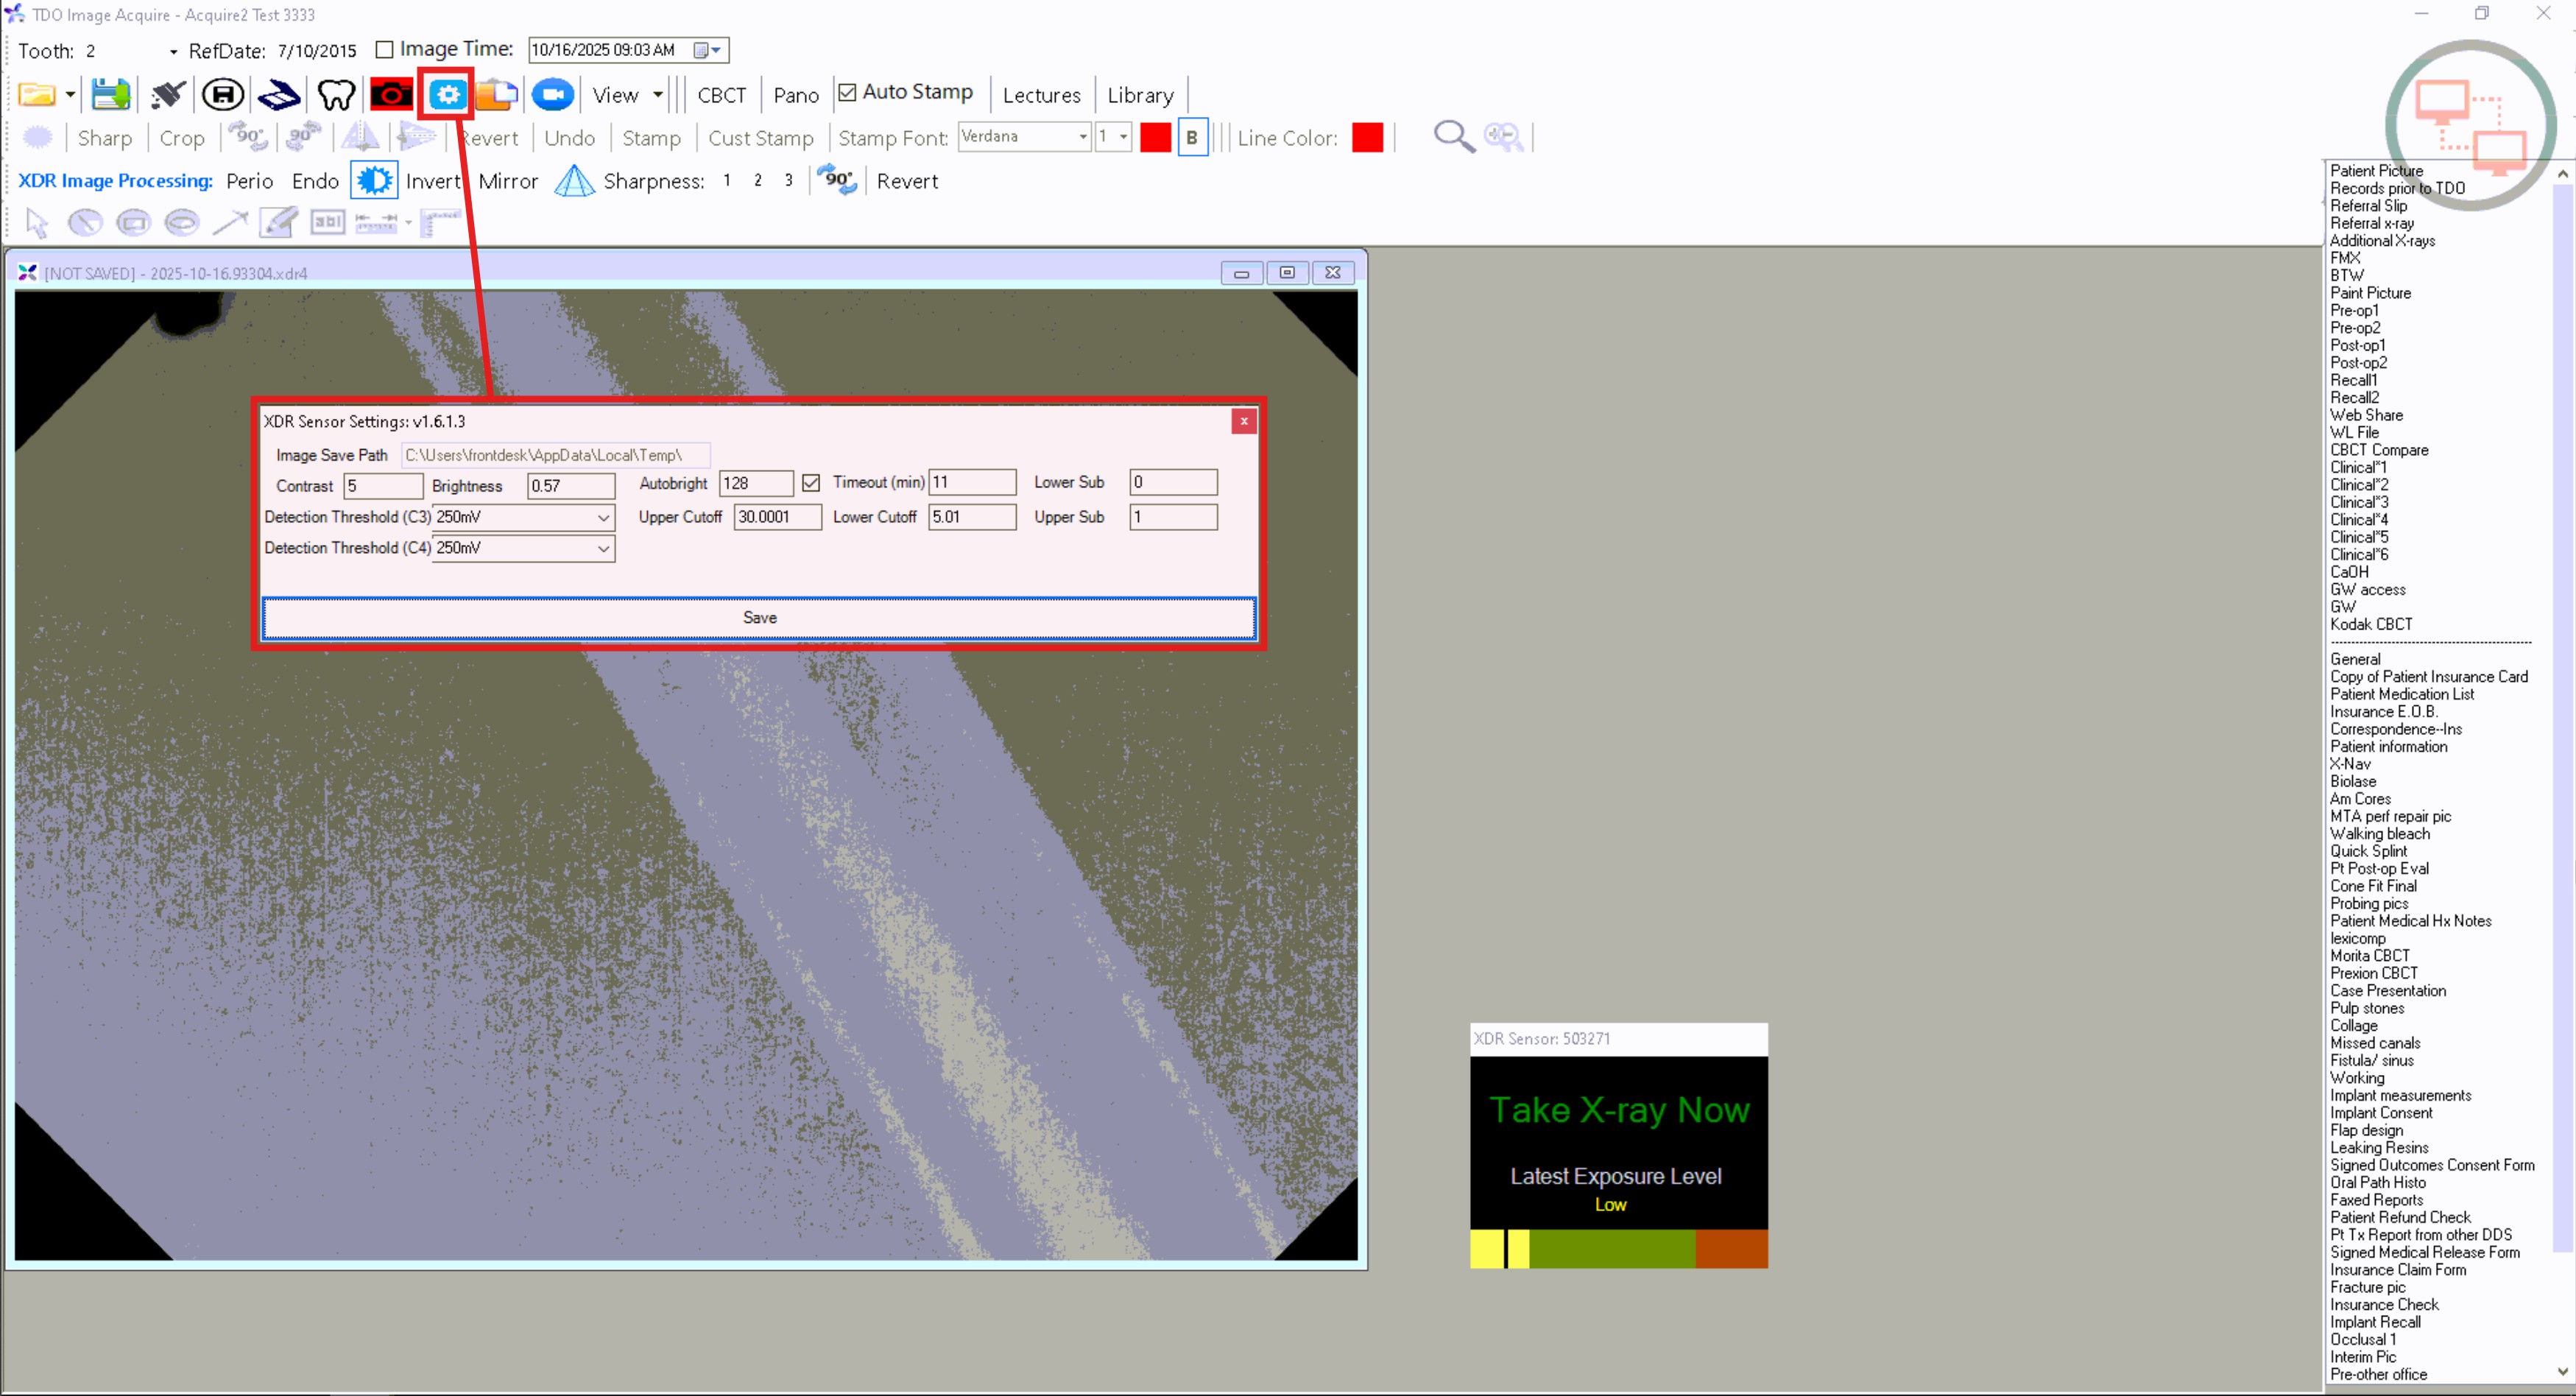
It is recommended to NOT save your selection for the first two options (Brightness and Contrast), as XDR’s ‘Auto bright’ feature is designed to automatically adjust the brightness of each image at the time of capture. If the doctor would like to have the captured image to be brighter or dimmer, the proper place to adjust this setting is in the XDR Sensor Settings (see the screenshot below). If you have XDR configured as your Digital Radiography option in the Control Table, you will be able to see the “Configure XDR Sensor” button circled in red in the screenshot below. This is an XDR control and the user would need to contact XDR if they need help in adjusting these values.
NOTE: This is specifically for those using XDR sensors and software. This video does not apply to those using sensors and software from other manufacturers.
The video below shows the sharpening filters available for XDR users.