Schick Sensor Integration with TDO: Sidexis 4.4 Bridge & SiTwain Driver
Estimated Reading Time: 4 MinutesPractices using Schick sensors for digital radiography have two supported integration options with TDO: the Sidexis 4.4 Bridge and the SiTwain driver. Both are separate installs that must be set up by Dentsply Sirona support before any TDO configuration can take place. For upgrade assistance, existing Schick users can visit dsgo.to/s4upgrade, or contact Dentsply Sirona Technical Support at 1 (800) 659-5977.
Note: The CDR Intraoral Twain driver previously used for Schick sensor acquisition is no longer supported. It is incompatible with Windows 11, and TDO Tech Support cannot assist with issues arising from that integration. Practices still on CDR Intraoral Twain should transition to one of the two supported options outlined in this article.
The Sidexis 4.4 Bridge (supported on TDO v12.463 and above) allows users to launch the Sidexis software from TDO, and images can then be copied and pasted into TDO Acquire to be saved directly to the patient's chart. The SiTwain driver (supported on TDO v12.485a and above) provides a direct acquisition path as an alternative to the full Sidexis application, though note that a valid Sidexis license is still required. Setup steps for both are covered in the sections below.
SiTwain with TDO12
Requirements:
- TDO Version 12.485a or newer.
- CDR Intraoral Twain must be uninstalled. If not, please contact Sirona Support
- Sidexis 4 must be installed.
- SiTwain 1.3 or newer must be installed and activated.
TDO Configuration:
In TDO, go to Setup > Site Configuration > Edit Control Table > Workstation Settings. Set the Digital Radiography settings like so:
- Radiography Software: Twain
- Radiography Path/Source: DS Intraoral X-ray
- Default option
That is all that is needed for setup! From TDO, you can then launch the SiTwain from Image Acquire> Tooth button
You will be able to take 1 X-ray at a time, but when pressing finish, the Twain UI will reopen to continue acquiring.
Sidexis 4 Bridge with TDO12
Requirements:
- TDO version 12.463 or newer.
- Sidexis 4 must be installed
- The Slida_SDK should be installed and configured properly. Please contact Sidexis for steps to install the Slida_SDK or go to https://www.dentsplysironasupport.com/en-us/user_section/user_section_imaging/software-and-tutorials.html to install the Slida Configuration Tool
Installing Slida Configuration Tool
Note: As of 4/22/26, The SLIDA tool has been removed from the Sirona website. Due to this, we recommend the SiTwain driver option.
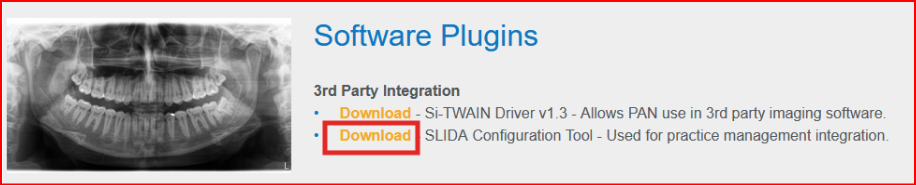
- Go to https://www.dentsplysironasupport.com/en-us/user_section/user_section_imaging/software-and-tutorials.html
- Scroll down until you see ‘Sidexis 4”

- Click on the plus (+) sign to expand the menu
- Scroll down until you see “Software Plugins”
- Click on “Download” to install “Slida Configuration Tool”
- Extract the file
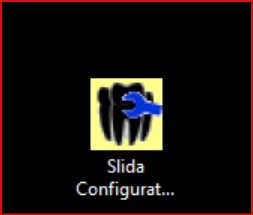
- Move the “Slida Configuration Tool.exe” to the desktop

- Double-click on the “Slida Configuration Tool.exe” from the desktop
Steps to Bridge Sidexis with TDO 12:
- Contact TDO Support for the TDO.Imaging.Acquire.dll file.
- Copy the TDO.Imaging.Acquire.dll to their \Dotnet folder. Make sure TDO is closed before pasting.
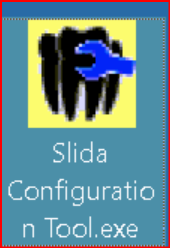
- Launch “ Slida Configuration Tool.exe - SidexisSlidaConfiguration(.exe)” on the desktop. Just double-click (no need to run it as admin)
- The “Slida Configuration Tool” should be displayed.
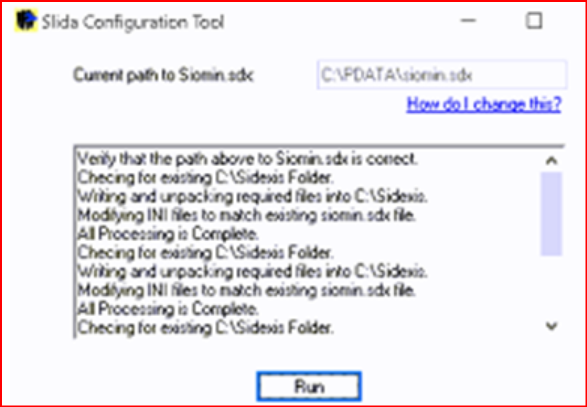
- Click on Run
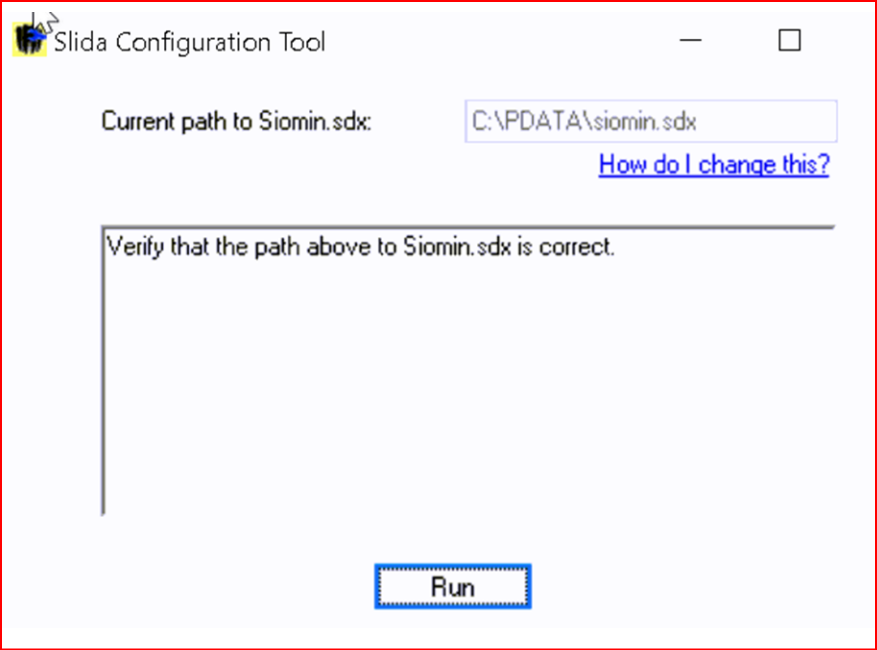
- The Slida Configuration Tool should be checking the configuration
- Pay attention to the current path to Siomin.sdk

- If the user has this same path, there is no need to do anything
- If the user has a different path in the “Current path to Siomin.sdx”, open the TDO INI file and add this configuration: SidexisPathToSiomin=C:\PDATA\
In some computers, the patch could be \\[Server Name]\PDATA\siomin.sdx. If this is the case the INI should be like this: SidexisPathToSiomin=\\[Server Name]\PDATA\
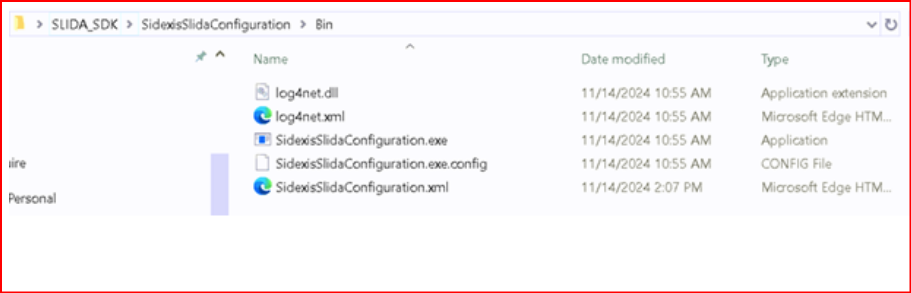
- a. Also add the path for Slida in TDO.ini. Slida Path is where the SidexisSlidaConfiguration.exe was installed. Note: If you cannot find the SLIDA_SDK, skip this step and continue to Step #11.
SlidaPath=C:\Users\[Username]\Desktop\SLIDA_SDK\SidexisSlidaConfiguration\Bin
11.Close the Slida configuration
12. Launch TDO
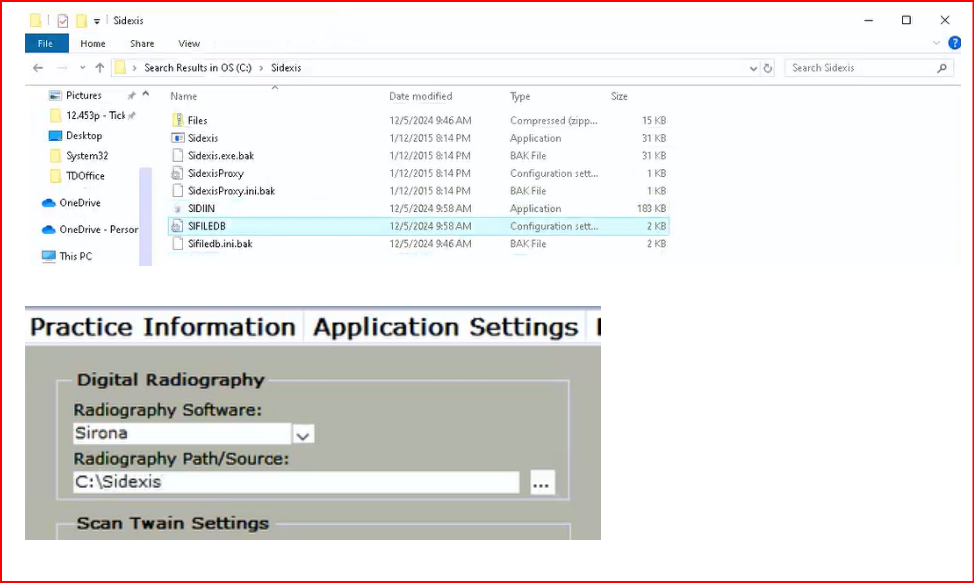
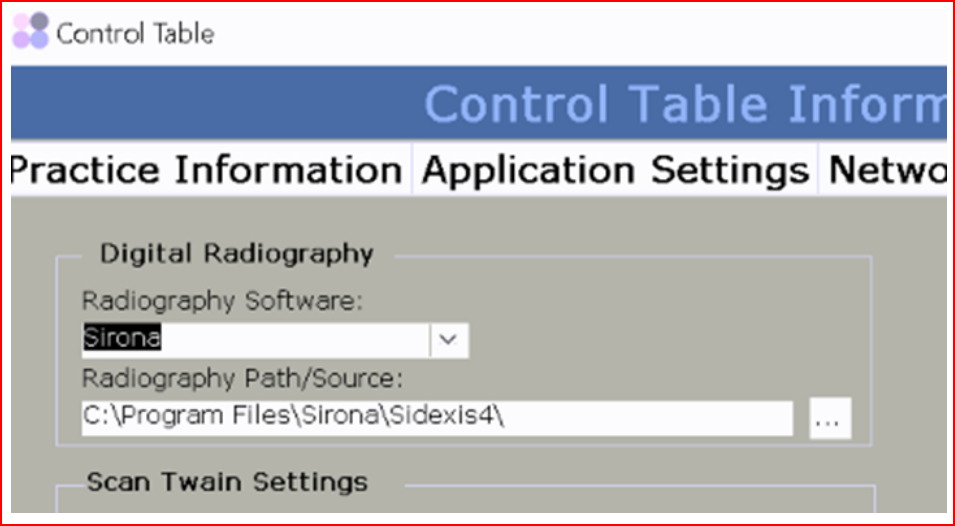
13. Go to Control Table> Workstation and change the rad Software to “Sirona”, Radiography Path/Source C:\Program Files\Sirona\Sidexis4 or C:\Sidexis\
IMPORTANT: Please note, this is the path where Sidexis is installed in the computer, or where the SIFILEDB.ini is located. TDO uses this path to look for the executable file called Sidexis.exe or Sidexis4.exe.
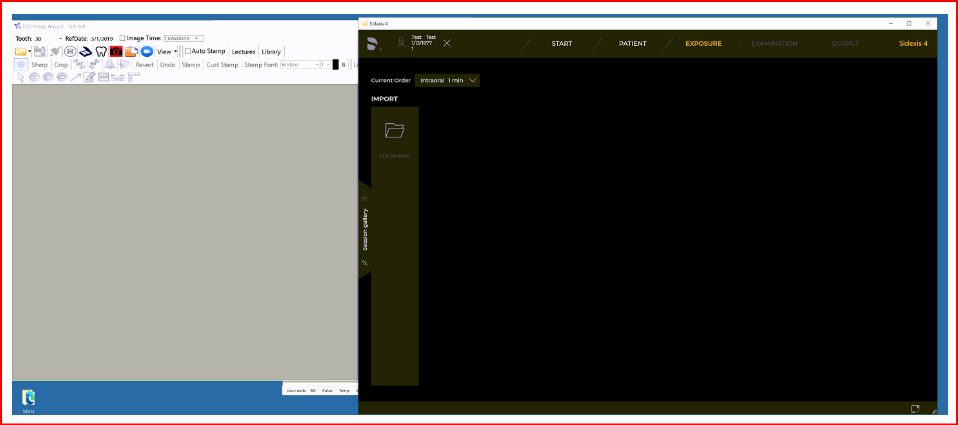
- Go to Acquire, and click on the Tooth button to acquire an X-ray
- TDO will launch the Sidexis
- Sidexis should open the patient’s chart on the sidexis side or it will create a new record for the patient if it’s a new patient.
- Take an X-ray.
- Once the X-ray(s) is/are on sidexis software, the user should be able to copy the image and paste it into Acquire.
- Double-click on the image that is going to be copied
- The image will show on the screen.
- Right-click> Copy to clipboard.
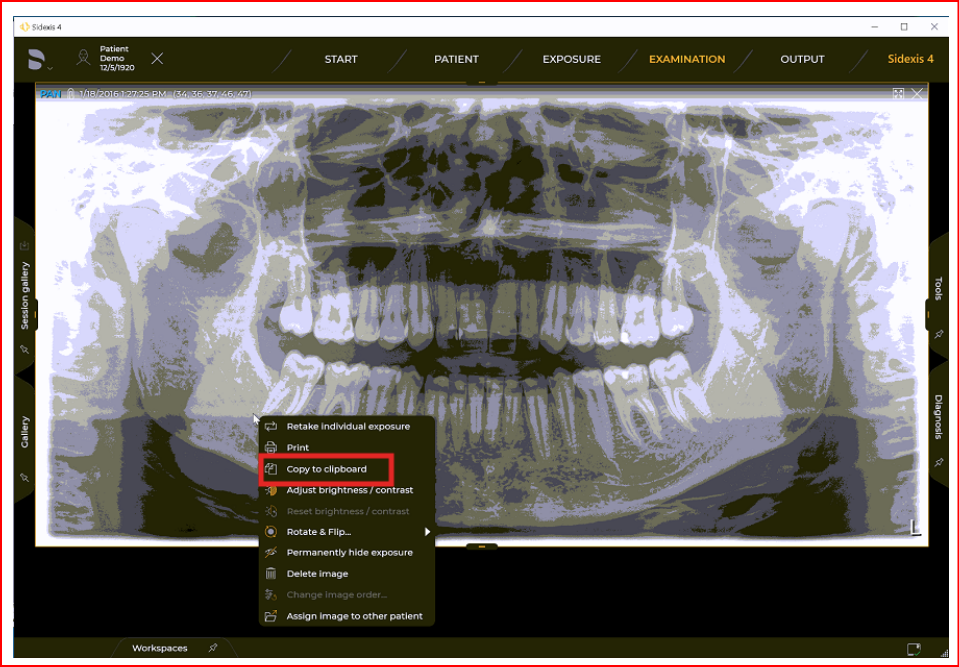
- The image should be copied to the clipboard
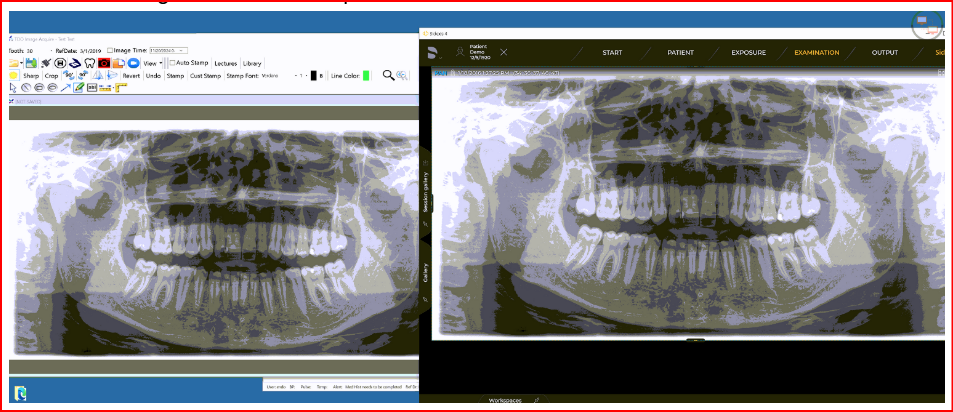
- Go to acquire and paste the image
- The image should be in acquire
Note: If Sidexis is left open and and another patient is selected in TDO, Sidexis will switch to the new patient
Troubleshooting
Sifiledb.ini missing
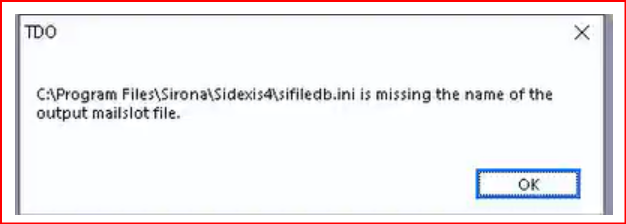
If this error pop ups when testing, please make sure the “Radiography Path” in “Workstation Settings” in TDO is pointing to where the SIFILEDB.ini is located