Calendar Settings Overview
Estimated Reading Time: 2 MinutesPractice Wide:
-
Setup > Program Setup > Calendar > Times and Colors
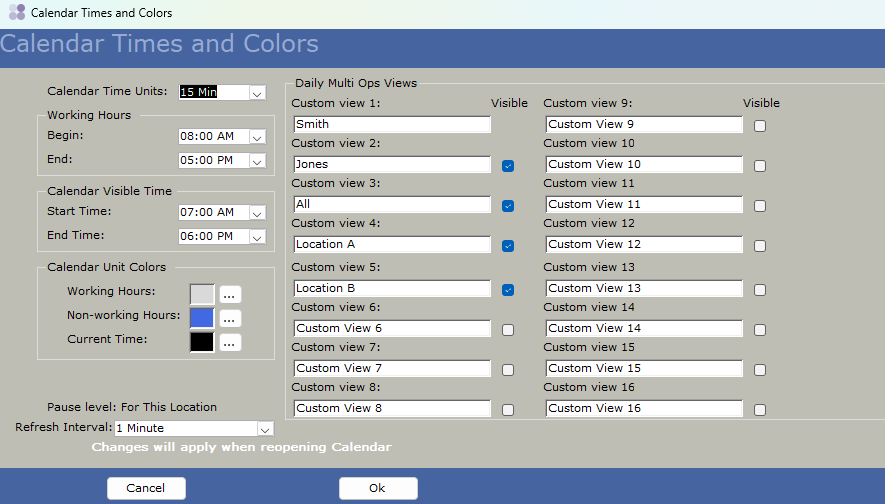
This is where the earliest and latest working times are set, visible time to extend the calendar as desired (I usually do 30-1 hour prior and 1 hour post). This is also where the names of the tabs that show across the top are designated.
-
Setup > Program Setup > Calendar > Color Blocks
These are permanent visual changes to the calendar such as blocking off noon to 1pm for lunch Monday to Friday or blocking off every Friday from 1pm to close because you're leaving early on Fridays.
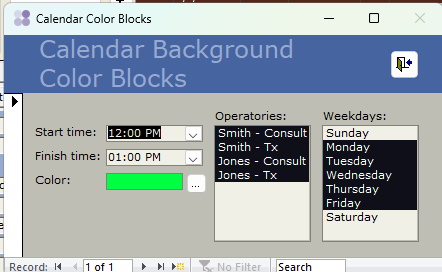
You will need to make sure and click the arrow with the asterisk to make a new record or it will keep overwriting the first one.
-
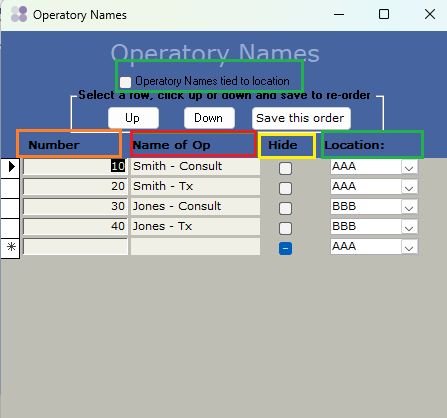
Program Setup > Operatory Names and Order
This is where all of the operatory columns are named, the order can be changed, and a currently unused column can be hidden (they should not be deleted or overwritten since there is history in those columns). Columns can be tied to a location (so they can't make an appointment for Location A in a Location B operatory column) by checking the box at the top and selecting the appropriate location in the drop down for that column.
Workstation Setting:
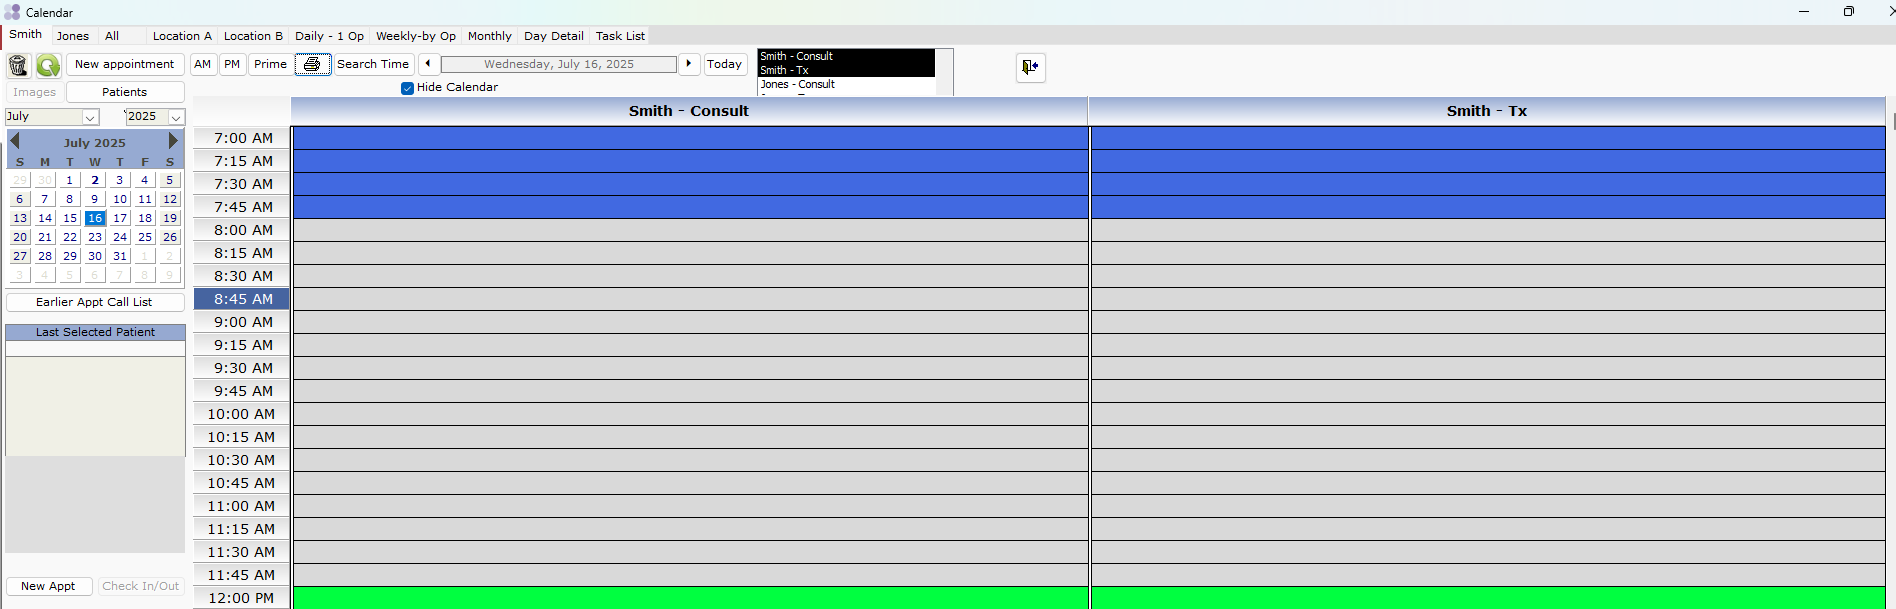
With the Calendar open, click on each tab and select which columns should be visible (black) or not visible (white) for each tab view
User Specific Setting:
Setup > Program Setup > Formatting
The settings here are
Appointment line 1 (should not be too long as there is no word wrap)
Appointment line 2 (line break options so can be multiple lines long, just keep in mind not all information will be visible if it is a short appointment)
Appointment details (the box to the left on the calendar when an appointment is selected)
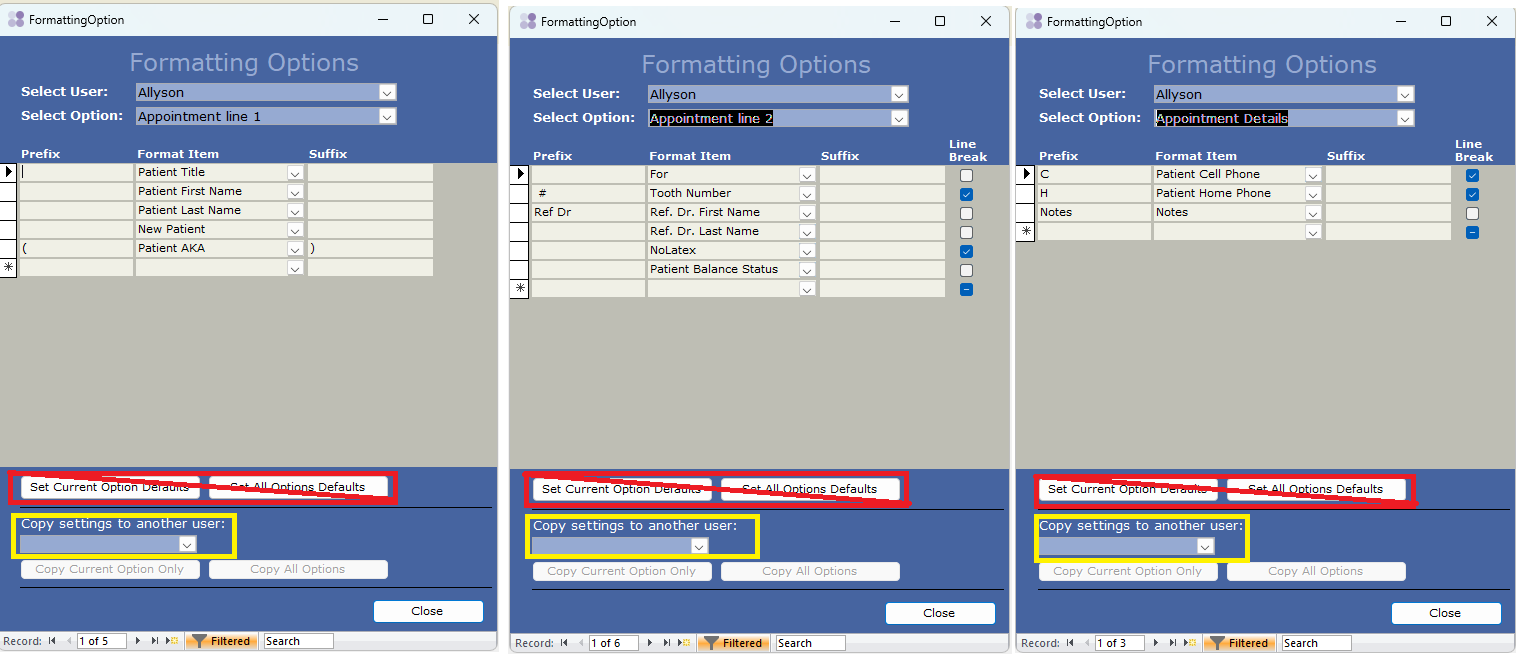
If there is a new employee, you can copy an existing employee's view to the new user by logging in as the user with the desired view, select the new user in the drop down Copy settings to another user (yellow box above) and then copy current or all options (I recommend all) to the new employee.
Do not use Set Current Option Defaults or Set All Option Defaults as that will reset the view for the Select User to what the system ships with.