Sending Appointment Confirmations from TDO
Estimated Reading Time: 2 MinutesOverview
If you are a TDO Cloud/Web user, you can send out appointment reminders from TDO using the Letters module.
Detailed Instructions
The first step in sending out appointment reminders from TDO is making sure that you have a template containing the proper tokens related to confirming an appointment. There is a generic template on the TDO4Endo.com website that can be customized to match the look and feel of the templates your practice is currently using.
To download, first log in to the TDO4Endo.com website. Once logged in to the website, click the Technical Support tab and choose Support Materials.
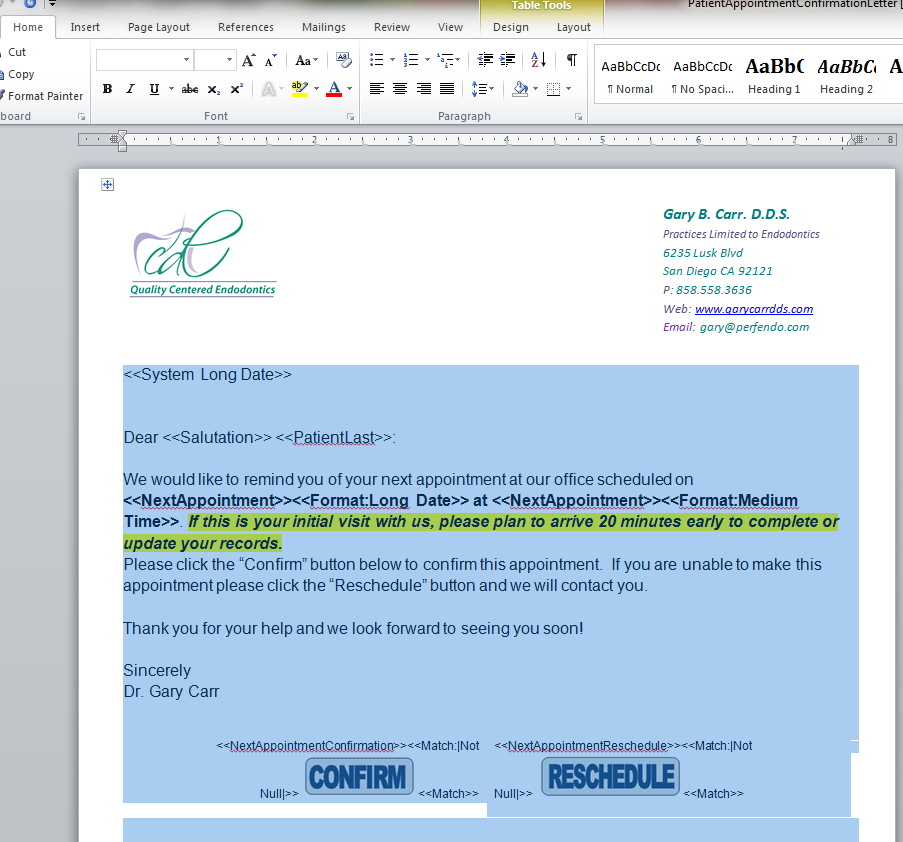
The template to download is called Patient Appointment Confirmation Letter. Right-click on the document and save
Open the document in Microsoft Word and copy all the text
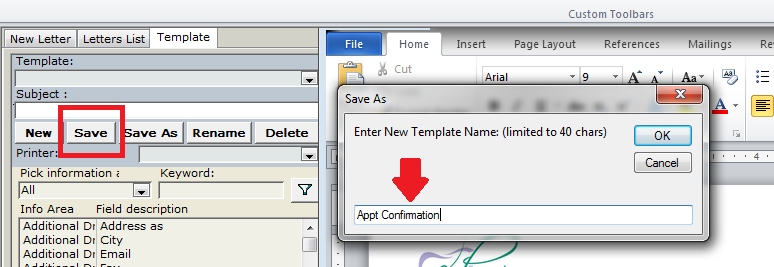
Open the Letters Module and select the Template area.
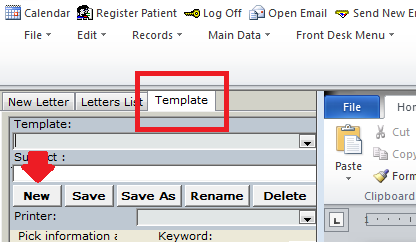
Click New and paste (or paste keeping the source formatting) the text in the blank template.
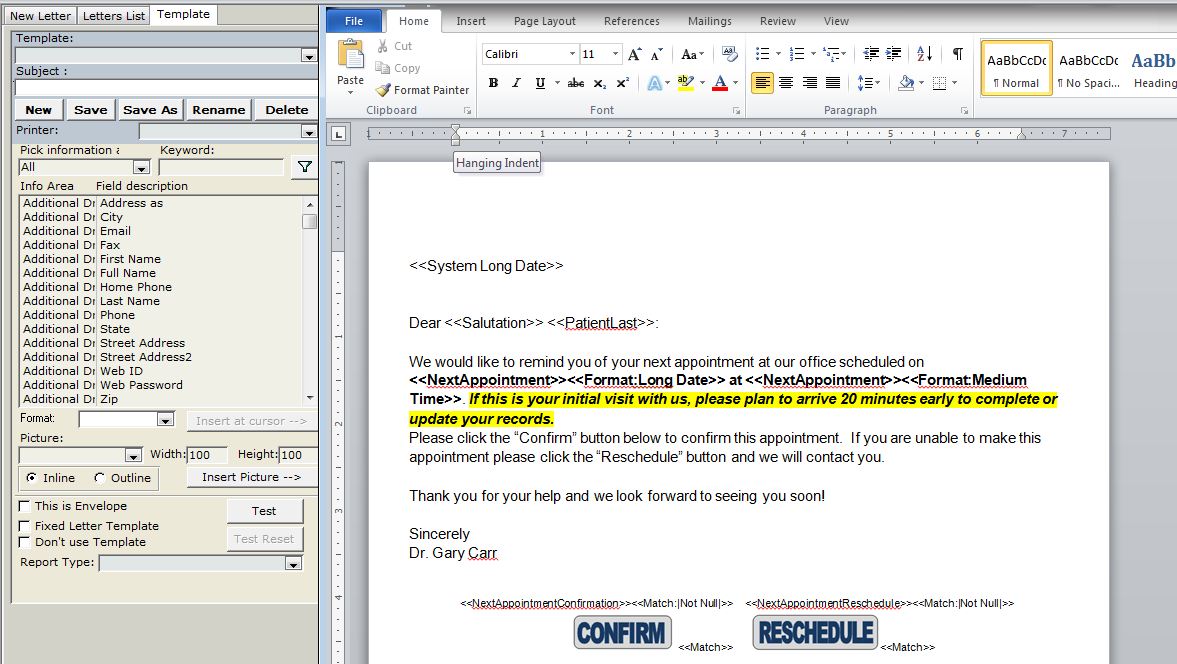
After this has been done, you can add your letterhead and customize it as you see fit.
Save the template.
Ensure that the delivery options for the template have been set to send the Patient an email.
Now you can either send out individual confirmation e-mails or send out a batch letter to multiple patients.
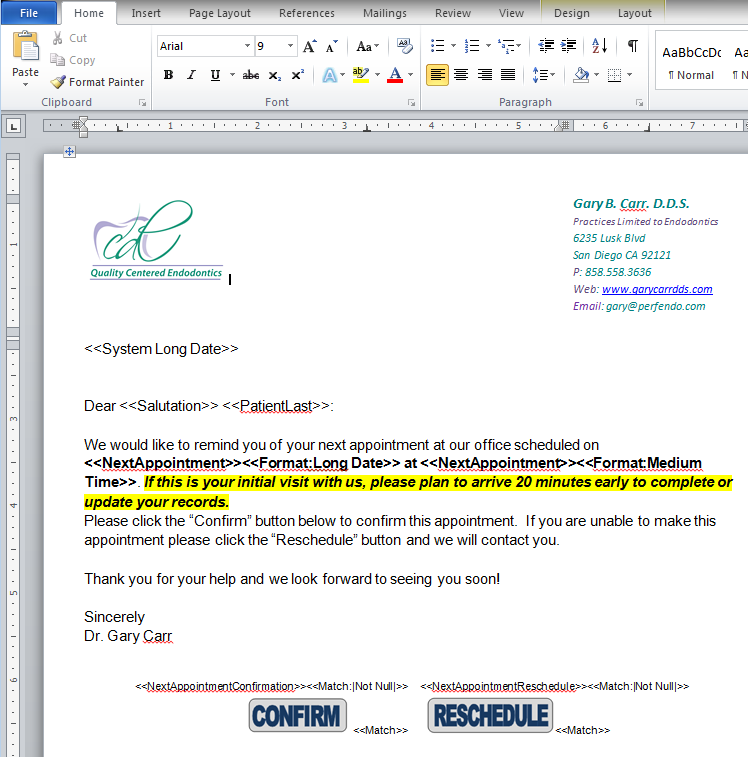
As you see in the template, there are options to either confirm or reschedule the appointment. If the patient selects Reschedule, it will send a status notification to whatever email is set up to receive web notifications to let you know that the patient needs to be contacted to reschedule.
When the patient clicks “Confirm” in the email that they receive, this will automatically trigger the following:
1. The telephone icon in the appointment window will automatically change to the green telephone when the patient confirms via the link.
2. A confirmation note will be added to their appointment automatically, which says “Patient Confirmed Online on Mar 13, 2017 12:04 PM”.
If the patient clicks 'Reschedule', the phone icon will turn red.
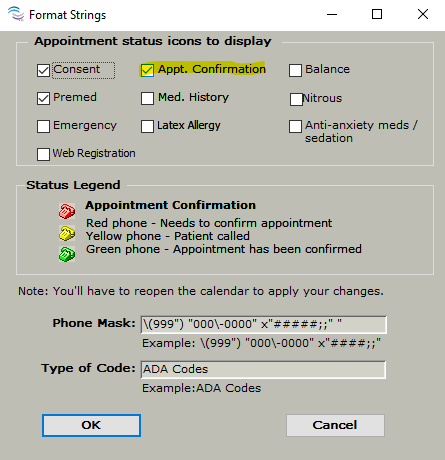
To turn on the phone icon feature, go to Program Setup > Format String> Appointment Confirmation.