Replica Program Setup/Configuration
Estimated Reading Time: 6 MinutesOverview
TDO’s Replica service is used to synchronize data in real time between practices in a unified TDO database. Once TDO’s Tech Support & IT Teams configure a new location(s) in the replica, you’ll need to update some settings in TDO. Please review this article in its entirety and ensure that you have taken all the recommended steps to make sure that you are prepared to use TDO in a replicated environment.
NEVER disable the Replica service on your primary server. If the Replica ever needs to be disabled for any reason, TDO’s IT team will do so.
All workstations across all locations MUST have unique computer names. To see the name of your computer, strike Win + Pause/Break on your keyboard.
Detailed Steps
Practice Information
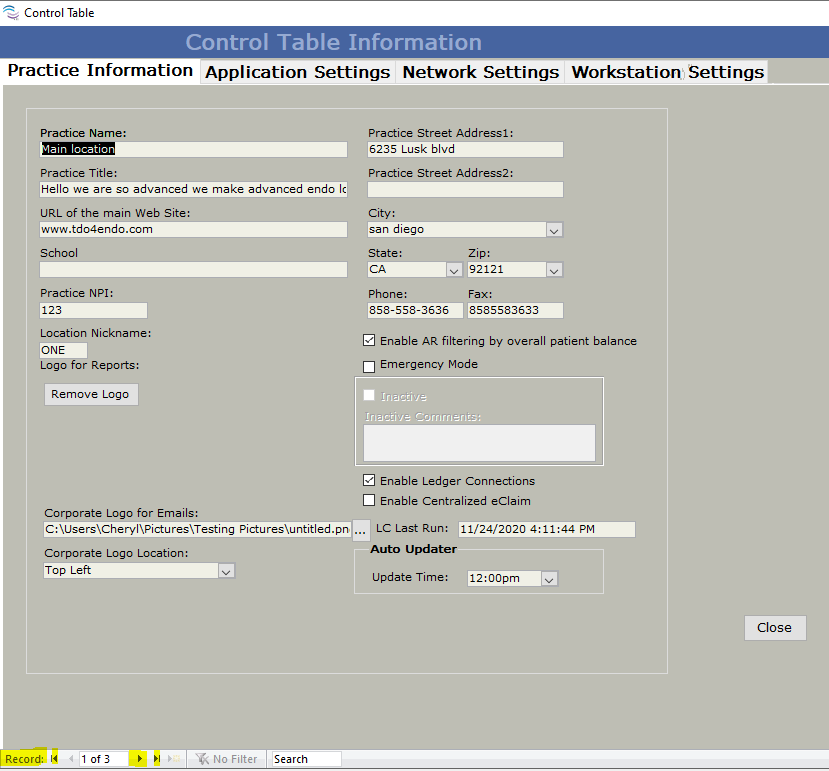
Open the Practice Information tab of the Control Table [Version 11: [Administrative > Edit Control Table > Practice Information], Version 12: [Setup > Site Configuration > Edit Control Table > Practice Information]. In order to view and edit this information, you will need to log in as a user that has been set at a security level which has access to this menu.
You can cycle through the practices by using the Record buttons at the bottom of this window (see screenshot below). You can identify which record you are editing by viewing the Network Settings tab. This tab will show you the Local Server Name and Server IP Address of the record in question. If you are not sure which server corresponds to which practice, you can ask your IT Professional.
Generally, one record will be reserved for Cloud Services. You can identify this record by viewing its Network Settings tab. The Local Server Name and Server IP Address will not be any values that you recognize. Once you have identified this record, be sure not to try to edit any fields therein; doing so will cause issues.
You will need to set Practice Names, Practice Addresses, and other information on the Practice Information tab for each record. Set a Location Nickname for each record (1-3 alphanumeric characters). This will be used to differentiate practice locations elsewhere in the program.
Application Settings
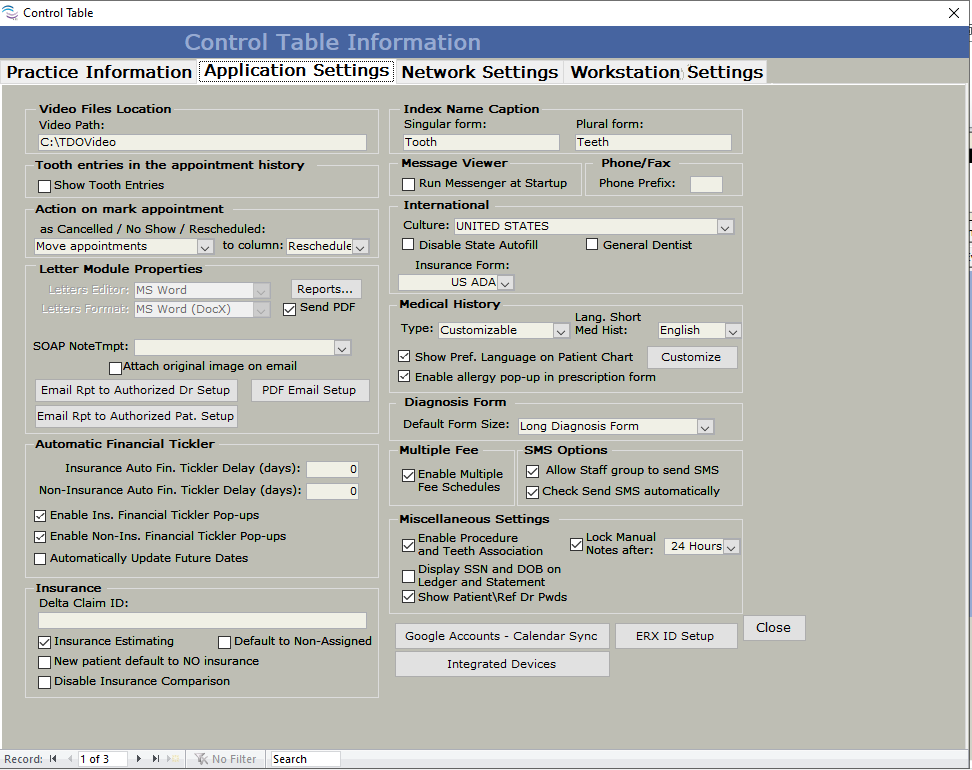
The settings on the Application Settings tab of the Control Table are set per location [Setup Tab > Site Configuration > Edit Control Table > Application Settings Tab]. If you’ve already set these for your primary location, you’ll most likely want to copy these settings from that record to the other records. You may wish to add an operatory name to contain the Cancelled / No Show / Rescheduled appointments from the new location.
Adding/Editing Teeth
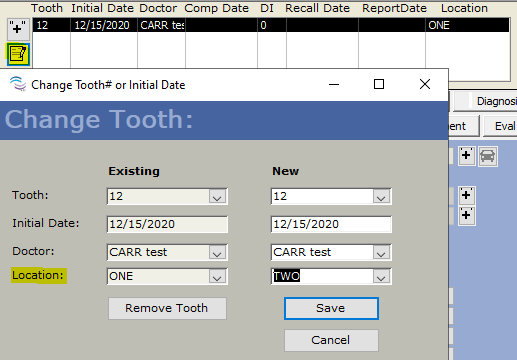
After configuring the Location Nicknames, you’ll be able to select the Location in a dropdown menu when adding or editing a tooth in a patient’s chart. You’ll see this Location shown in the last column of the tooth/case display when viewing a patient’s record. If you need to change the location associated with a tooth, you can edit the case by clicking the edit button (highlighted in the screenshot below beneath the Add Tooth [+] button).
Calendar
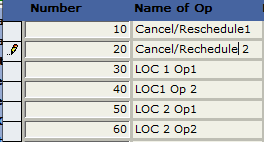
You may wish to add or change operatory names corresponding to rooms in the new replicated practice(s). One philosophy for this is naming the Operatories like the ones in the screenshot below. That is [Location 1 Nickname] Op1, [Location 1 Nickname] Op2, ... , [Location 2 Nickname] Op1, …, etc. If you choose to name your operatories in this way, it may also be useful to rename the Custom View tabs in the calendar to correspond to the replicated locations, naming the tabs after the various locations, and selecting the operatories corresponding to the given location under that tab.
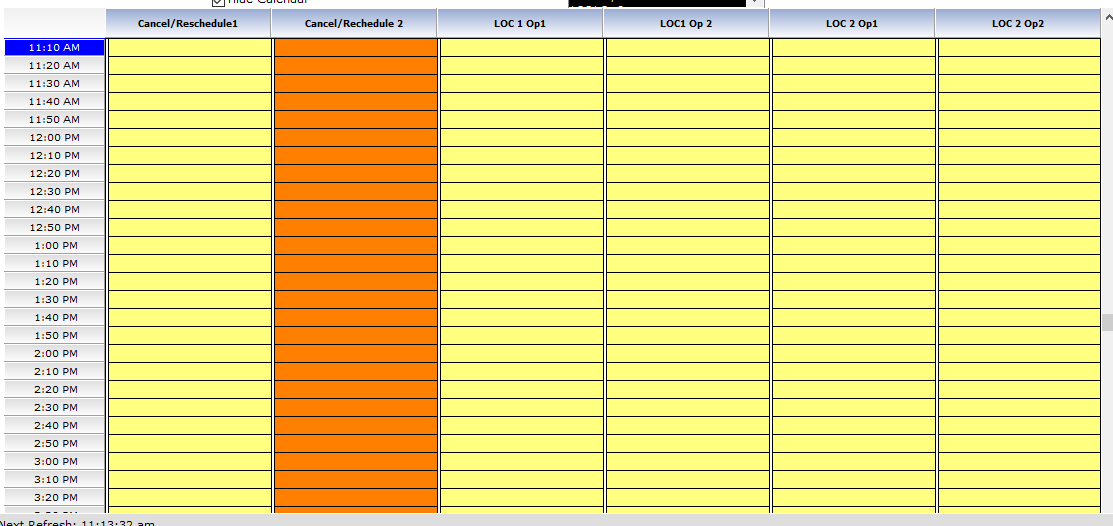
The calendar custom view tabs can be updated here: Setup Tab > Program Setup > Calendar > Times and Colors
You may want to create a custom view to see only columns associated with a specific location. Another option is to create a custom view per doctor, so the doctor can easily view their schedule at all locations.
This setting is configured per workstation and must be applied individually on each computer. It cannot be automatically updated across all devices.

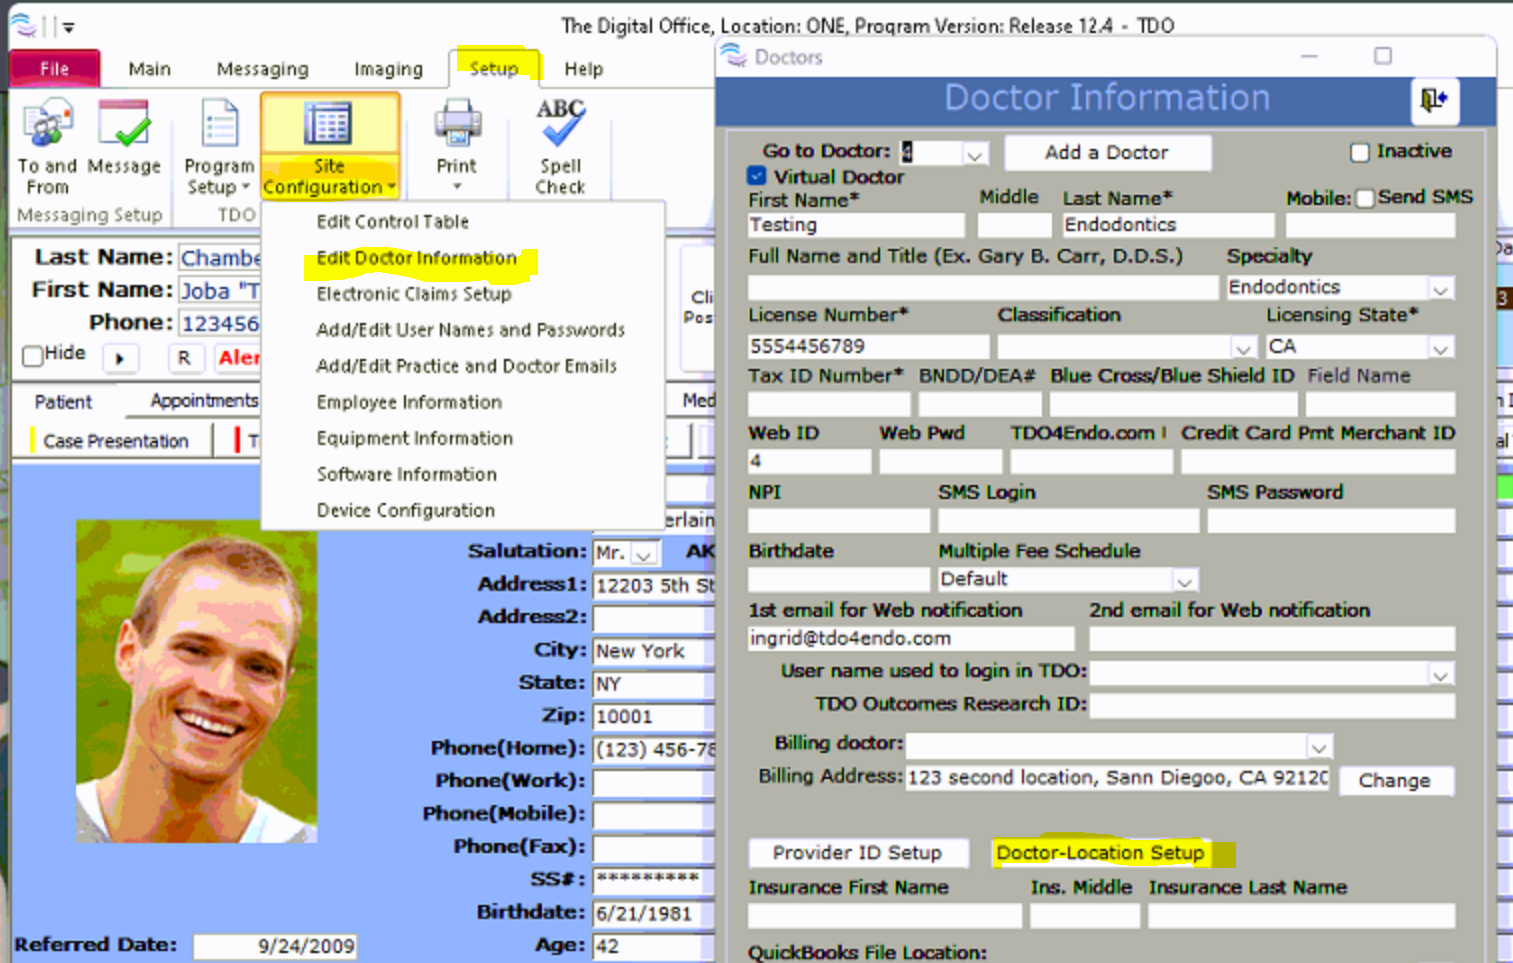
Doctor Information: Billing
Open Doctor Information (Version 11: [Administrative > Edit Doctor Information], Version 12: [Setup > Site Configuration > Edit Doctor Information]). If the doctor(s) uses/will use different Tax ID Numbers for different locations, it may be necessary to create a distinct doctor record in TDO for each additional location. Contact TDO Support for more information.
Policy and Consent Forms
The same policy and consent forms (Version 11: [Program Setup > Policy/Consent], Version 12: [Setup > Program Setup > Policy/Consent) are used for all locations. There are two approaches to this: a) make sure that your forms are applicable to all locations, b) create forms individualized for each location, and name them accordingly so that patients at Location 1 fill out ‘Informed Consent L1’, patients at Location 2 fill out ‘Informed Consent L2’, etc.
Letters Module
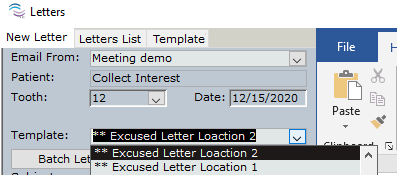
Your templates may use certain tokens that pull information from the Practice Information tab. Templates that use these tokens will work for all locations, as the template will populate this information from the respective location at the time when a New Letter is generated using the template. If you are using an image (such as a letterhead) containing your practice title and/or address in any templates, you may want to create copies of these templates to be used at the other locations, with an image, or text, or tokens, that will cause that template to display the information of the corresponding location.
Electronic Claims
For DentalXChange users who have integrated their ClaimConnect services with TDO will discover that each TDO location within a replica needs to have the ClaimConnect credentials configured. For instructions on this, please see this article.
This is the only setting that must be configured at the physical location.
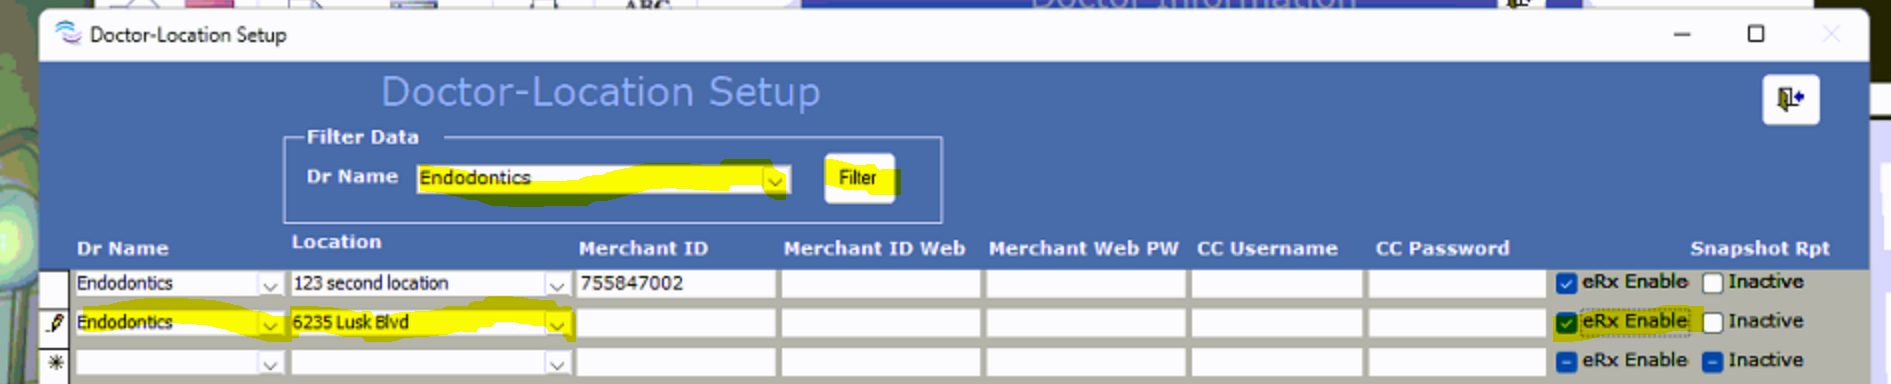
Electronic Prescriptions (eRx)
If you are using MDToolbox’s integrated eRx services with TDO, you will need to enable eRx at the new location for each eRx prescriber.
Setup tab > Site Configuration > Edit Doctor Information > Doctor Location Setup button
Filter Data: Select 'Dr Name' > Filter button
In a new blank row: Select Dr name, Select Location, and check eRx Enable
Repeat for each eRx prescriber
Credit Card Processing - TDO Payments
If you are using TDO Payments integrated services, changes may need to be made to the settings in order for these services to continue to function in a replicated environment. Contact TDO Support for more information.