Server/Database Migration
Estimated Reading Time: 4 MinutesOverview
When it's time to replace your server, you will need to move your TDO database from the existing server to the new server, among other things.
We recommend scheduling a server migration with our team to ensure a smoother experience and to reduce potential risks.
However, you are welcome to perform the server migration yourself. Follow the steps outlined below to ensure that no data is lost and that all workstations can successfully connect to the database.
Replicated offices (multiple locations with a single database) should NOT try to perform a server migration without assistance from TDO Support. If you need to replace one of your servers, please schedule an appointment below.
Schedule Server/Database Migration
Schedule a server/database migration here - Click to Schedule
Prepare for the appointment by following the steps in the Prepare for the Migration section below.
OS SQL Compatibility
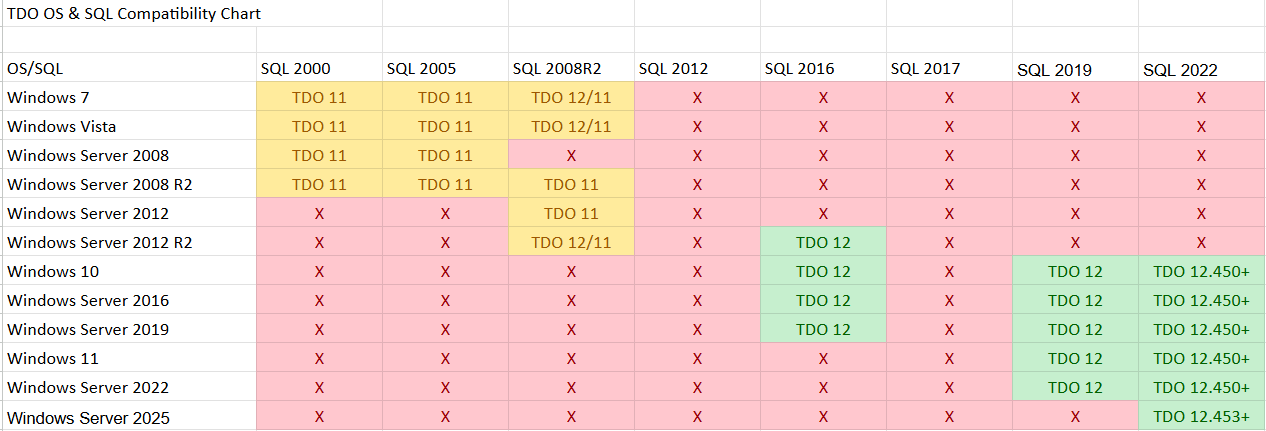
If the offices are not replicated, we can just upgrade the version of SQL when we migrate. If the office is Replicated, they need SQL Standard to be bought and installed at the main location. For scheduled migrations, please leave either the SQL key or the SQL Standard installer on the new main server. If you have any extra questions, please contact TDO Support.
Prepare for the Migration
-
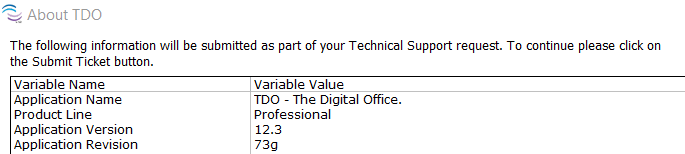
First, install TDO on the new server. Make sure that you install the same version of TDO on the new server as you are running on the old server. To check what version of TDO you are running, open Help > About TDO/Submit Ticket.
-
In the days or weeks before the cutover, copy the contents of the XRays folder (a subfolder of the TDOfficeData directory) from the old server to the new server. It is recommended that you perform the copy job during off-hours to limit impact on the performance of the existing server. Large databases can sometimes take several days to transfer.
-
Optionally, you can set up a file sync to automatically copy all new files created/modified in the XRays folder on the existing server to the XRays folder on the new server. Otherwise, you’ll just need to copy all new files, created between the initial copy and the migration date, to the new server.
Self Migration Steps
-
At the scheduled ‘Start’ time of the migration, all users must log out of TDO, and cannot log back in until the migration is completed. Any changes made in TDO during the migration WILL NOT BE SAVED.
-
Once you’ve ensured that ALL users have logged out of TDO, run a TDO Backup, selecting only the ‘Server Data’ option. Copy the resulting file, either Patients.bak or Patients.enc (if your database is encrypted) to your new server.
-
Copy any files with a ‘Date Modified’ attribute greater than that of your initial copy job (that is, all the new/modified files since you first copied the contents of the XRays folder) from the XRays folder on the old server to the XRays folder on the new server. If you previously set up a file sync (as in step 2a), you can skip this step.
-
Restore over the blank database on the new server using the backup file you created in step 4.
-
On the new server, log into TDO to make sure that you can see the now-restored data from the old server.
-
After confirming that your TDO data was successfully restored to the new server, you should disable access to the TDO database on the old server (to eliminate the possibility of users making changes to the wrong database). To do so:
-
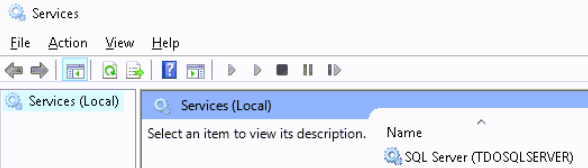
Stop and disable the TDOSQLSERVER service on your old server.
-
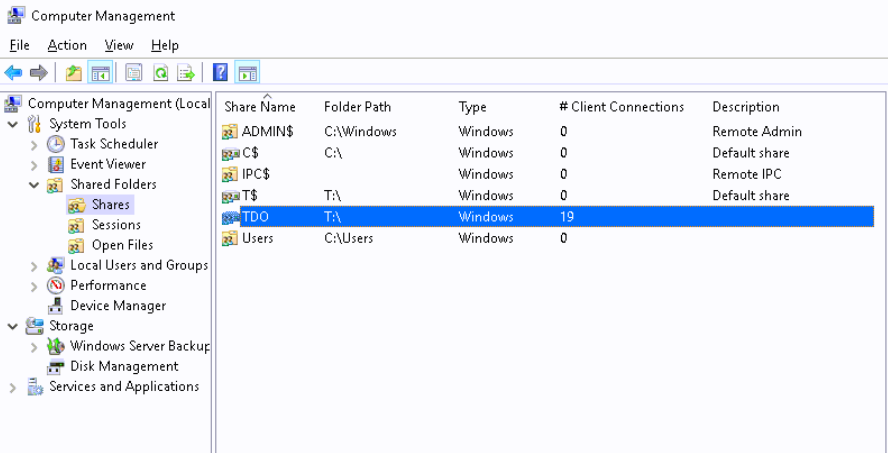
Disable sharing on the TDO directory on your old server.
-
Reinstall TDO on each of the workstations, pointing the Data Directory path to the shares on the new server.
-
Log in to and test the functionality of TDO on each of the workstations. Make sure to test any integrated programs or devices (digital radiography, Letters Module, etc.).
-
IMPORTANT: TDO Cloud users - Contact TDO Support to have Cloud set up and configured on your new server (and deactivated on the old server).